
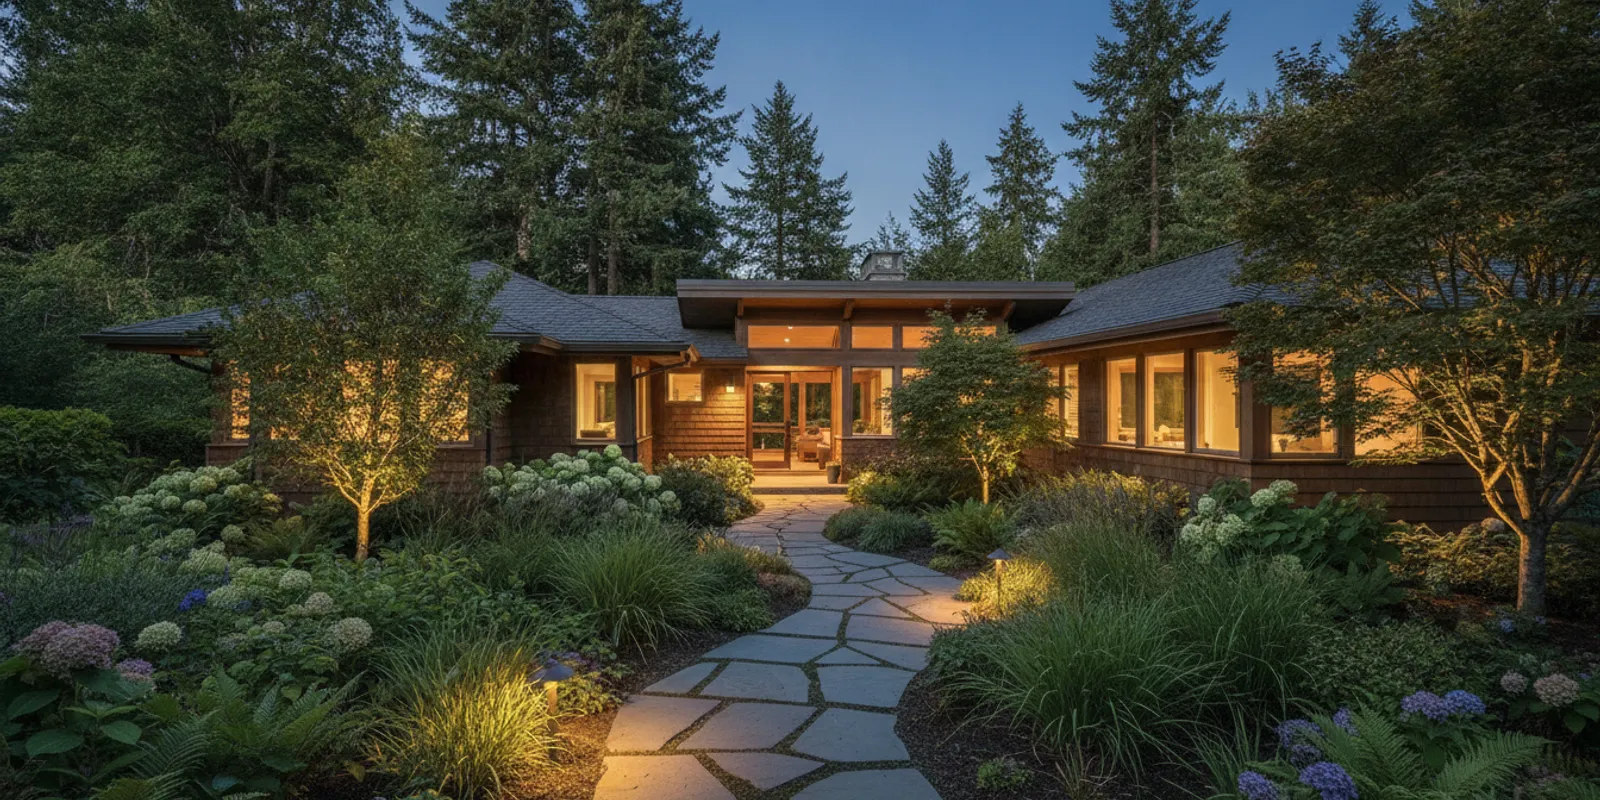
Choosing between professional vs DIY landscape lighting comes down to more than whether you can place fixtures in the ground. The right approach depends on the size and layout of the property, the effect you want after dark, how much planning and maintenance you are prepared to manage, and how much coordination the installation requires. DIY can suit a modest, clearly defined project. A professional design and installation process may be a better fit when several areas need to work together or when you want an itemized plan and continuing support.
Request a complimentary lighting consultation
What is the practical difference between DIY and professional landscape lighting?
A DIY project puts the planning, product selection, placement, installation coordination, adjustments, and future troubleshooting in your hands. That can offer direct control over choices and pace. You can begin with one small area, observe it at night, and decide whether to expand. The tradeoff is that you also own the work of deciding how the pieces fit together. The homeowner needs to define the desired result, establish what the property needs, select appropriate equipment, and revisit the design as plants and outdoor spaces change.
A professional project generally begins with a conversation about the property and the priorities for it. The designer considers the home, landscape features, paths, entries, sightlines, and the relationship between illuminated areas and darker ones. A proposed layout is then developed for review, followed by installation planning and, depending on the arrangement, ongoing support. The scope is specific to the site rather than a fixed package that assumes every yard is alike.
Neither route is automatically right for every owner. A small, contained project can be a reasonable learning project for someone who enjoys planning and hands-on work. Larger or more connected projects may involve more decisions than fixture count suggests. If the desired outcome includes a balanced view from inside the home, gentle wayfinding, several outdoor rooms, and a coherent appearance across the whole property, it helps to consider the composition as a whole before buying equipment.
It also helps to separate the question of who installs the lighting from the question of what needs to be designed. An owner could plan a modest project and later ask for help with a difficult area. A property manager could hire a professional to establish a clear scope and then decide how much work to take on internally. The useful question is not whether one approach is universally superior; it is which responsibilities, decisions, and service needs make sense for this particular property.
Which parts of a landscape lighting project need the most planning?
Start by describing what you want to see and how the space is used after dark. Is the priority a welcoming front entry, a visible route between a gate and a door, a seating area, a garden feature, or a more complete night-time view of the property? Listing priorities in order helps keep the design focused. It also makes it easier to compare a contained first phase with a broader plan.
Walk the site at dusk or after dark, where it is practical to do so, and notice the points where the experience changes. Look at the transition from driveway to entry, the edges of patios, changes in grade, planting beds, mature trees, and places where a route is hard to read. Consider what is visible from the street and from the rooms where people spend time. The purpose is not to mark every dark spot for a fixture. It is to identify what matters, what can remain in shadow, and how one illuminated feature will relate to the next.
Next, think in layers. A tree canopy, a textured wall, a path, and an entry each present a different design question. One lighting treatment will not necessarily serve all of them. Consider whether the goal is to reveal shape, show a route, bring attention to a feature, or make an outdoor area feel connected to the home. A restrained plan often depends as much on what is left unlit as on what receives light.
Finally, note practical constraints. Existing planting may grow or need care. A path could be resurfaced, a patio might be redesigned, or future landscaping could change the fixture locations that make sense today. Think about access for ordinary garden work, views from neighboring areas, and the location of outdoor controls or equipment. These considerations do not require a homeowner to make technical decisions before seeking advice. They help communicate the intended result and make the eventual scope more useful.
For more on how the overall design can respond to local conditions and property care, see landscape lighting design for Oregon properties. The article is useful context, while the best layout for an individual property still depends on an on-site review and the owner’s priorities.
How does fixture placement change the result?
Placement shapes the view as much as the fixture itself. A light aimed toward a feature can reveal texture, but the angle and distance affect how much of the feature is visible and whether the source itself attracts attention. A path treatment has a different job from a focal treatment. A strong design considers where people will walk and sit, what they will see from common viewpoints, and how light from one area relates to the rest of the scene.
For a DIY plan, begin with a small number of priorities instead of trying to illuminate every tree, bed, and architectural detail. Make a simple site sketch. Mark the house, doors, routes, significant plants, steps or grade changes, and outdoor living spaces. Add arrows for the views that matter, such as a view from a kitchen window or from a seating area. This sketch need not be a construction drawing. Its purpose is to make intentions visible and help avoid scattered decisions.
Before committing to a full layout, review the effect after dark and from more than one vantage point. Ask whether the path reads clearly, whether the focal point feels intentional, and whether neighboring features compete for attention. A row of equally bright points may look more like a line of equipment than a considered scene. Conversely, a single highly emphasized feature may feel disconnected if the nearby route and setting disappear into darkness. Adjusting the visual balance matters more than simply adding fixtures.
Professional planning brings these viewpoints and layers into one conversation. It can be especially helpful on a property with several outdoor areas, mature landscaping, long approaches, slopes, or views that change as someone moves around. A professional can discuss which features merit attention and how a path, entry, garden, and seating area might work together. That does not mean every part of a large property must be lit. A phased plan can identify the elements that matter first and leave room for later decisions.
Path lighting illustrates why purpose and placement should be considered together. The aim is to make the route legible within the setting, not to treat every path as an identical row of fixtures. Review Oregon pathway lighting options for additional considerations on fixtures, wiring, and mounting. Any final product and placement choices should be evaluated for the specific site and overall design.
What should you consider about wiring, controls, and equipment?
Equipment decisions are connected to the layout. A fixture is not a complete design choice by itself: its location, intended effect, relationship to other fixtures, and how the system will be operated all matter. A homeowner comparing products should look beyond appearance and ask what the complete installation requires, what components are included, how the system will be controlled, and what information will be available for later service.
Wiring and equipment coordination can become more involved as a project expands. A few lights in one defined area are different from a plan that extends through a front garden, side yard, driveway, and rear entertaining space. The larger scope may require decisions about routes, grouping, access, and how additions could be handled later. These are project-planning questions, not a reason to assume that every project has the same technical demands.
Do not guess about electrical requirements based on a product photograph or an online example. Product instructions and the conditions at the property matter. If a proposed task involves electrical work outside your knowledge or comfort, pause and seek qualified guidance rather than relying on a general article. Local requirements and site conditions can vary, so this guide does not make a general code-compliance or safety determination.
Controls deserve attention before installation, not as an afterthought. Ask how the system will be switched or scheduled, who will be able to operate it, and whether the control arrangement fits the way the outdoor areas are used. A simple arrangement may be preferable for a small, focused project. A larger plan can prompt questions about how separate areas should be grouped and how future changes will be managed. Write down what you expect to control and explain it during a consultation or product review.
For either approach, keep an understandable record of the equipment and layout. A simple record can include a property sketch, fixture locations, model information, control details, and notes about any later changes. This is useful when a lamp or component needs attention, when landscaping changes, or when another person takes responsibility for the property. A professional service plan should clarify what information and support are available; a DIY owner can create that record from the beginning.
How do DIY and professional projects compare day to day?
The following comparison is a starting point, not a promise that every DIY or professional project follows exactly the same process. A professional proposal should spell out its own scope, and a DIY owner should confirm what each product and task requires.
| Decision area | DIY approach | Professional approach |
|---|---|---|
| Design responsibility | You define priorities, sketch the plan, select locations, and make adjustments. | A consultation and design process can help organize priorities into a property-specific plan. |
| Project scale | Often easiest to manage when the first phase is small and clearly bounded. | Can coordinate multiple areas and phases under one reviewed scope. |
| Equipment and controls | You research product compatibility, instructions, and operation. | Ask the provider to describe the specified equipment, control approach, and handoff. |
| Installation coordination | You take responsibility for materials, work sequence, and decisions as conditions arise. | The agreed installation scope and responsibilities should be set out before work begins. |
| Changes over time | You keep records and decide how to adapt the layout as the landscape changes. | Ask what support is available for troubleshooting, repairs, or planned adjustments. |
| Budget clarity | Track product, tools, any qualified help, and the time required for the project. | Review an itemized, site-specific proposal and clarify exclusions and future service. |
Use the comparison to identify which responsibilities you want to manage yourself. If you enjoy testing a small-scale idea, research products carefully, and are willing to revisit the result, DIY may be a satisfying way to learn what matters on your property. If you would rather coordinate one design and installation process, or need several areas to feel consistent, a professional review may save decision effort even before you decide whether to proceed.
The comparison is also useful for commercial properties, HOAs, and multi-property managers. A decision may affect more than one user’s experience. Consider who approves the design, who maintains planting or paving, who operates the controls, and who will report a problem. The clearer those responsibilities are, the easier it is to set a workable scope and handoff. A written plan should make it possible for the people involved to understand what is included and what remains their responsibility.
What does professional landscape lighting cost, and what affects the scope?
There is no single project price that fits every property. The area included, the number and type of features, access, wiring and controls, selected fixtures, and the service details all affect the scope. A compact entry project is not equivalent to a design that includes a long approach, mature trees, garden beds, paths, and several outdoor spaces. A useful comparison begins with what the proposal covers, not just a headline total.
CLG Outdoor Lighting’s published planning range for landscape lighting is $5,000–$50,000+. Landscape lighting projects start at a $5,000 minimum project value. These figures are indicative planning information, not a quote or a promise about a particular property. The final, itemized proposal depends on site conditions and the agreed scope. Do not confuse the separate $2,500–$10,000+ planning range for permanent Gemstone architectural lighting with the landscape-lighting minimum; they are different service lines.
A DIY budget should include more than the fixtures visible in an online cart. List the intended areas, the equipment you expect to need, any tools or materials required, and any tasks for which you will seek qualified assistance. Account for your time to research, plan, install, test, document, and revise the result. If you may expand the project, consider whether a small initial purchase will remain useful as the plan grows. Avoid buying a complete set before you have a clear idea of what the layout is meant to accomplish.
When reviewing a professional estimate, ask what is included, what is not included, and which assumptions shape the price. Clarify the areas covered, the proposed fixtures and controls, how installation is described, and how later service or changes are handled. If the budget is limited, ask whether a smaller first phase can deliver a coherent result while leaving the rest of the property for later. A staged plan should explain both the immediate work and how the next phase would relate to it.
For more context on project-specific expenses and comparisons, see Oregon lighting costs for landscape and permanent systems. It can help frame questions, but an article cannot replace a property-specific estimate. A provider should review the actual site and priorities before describing the work and price for that project.
When is DIY a reasonable choice?
DIY may be reasonable when the project is limited, the desired effect is clear, and you are comfortable taking responsibility for the decisions and follow-up. For example, you might want to explore one garden feature or a small seating area rather than transform the entire property at once. Keeping the first phase contained can make it easier to assess how the light looks in context and whether it meets the intended need.
It also helps if you enjoy the process of testing and adjusting. An outdoor scene can look different from a product image, and the property itself may reveal details you did not notice in daylight. A DIY owner who is patient about observing the result, keeping notes, and making measured changes may prefer this iterative approach. The work still requires a clear plan and careful attention to the specific equipment instructions and site conditions.
Before beginning, write down a few limits for the project. Identify the area you intend to address, the features you do not plan to light, the outcome you want, and a budget boundary. Decide what will count as a successful first phase. A goal such as “make the route from the driveway to the entry easier to read while keeping the rest of the view understated” is more useful than “add lights to the front yard.” The former points to a particular experience and makes it easier to evaluate choices.
DIY may be less appealing if the project requires coordinating multiple areas, if you are uncertain about product or installation requirements, or if you do not want to manage future troubleshooting. Those are not failures. They are signals that the project could benefit from an experienced review. You can still participate actively by explaining how you use the property, what you want to emphasize, and what you would like to leave unchanged.
When should you consider a professional design and installation?
A professional consultation is worth considering when you want a coordinated result across several parts of a property, when an existing system is difficult to understand, or when the project needs to fit around other landscape work. It can also help when different people have different priorities. A homeowner may want a warm welcome at the front door, while a property manager is focused on a consistent standard across shared areas. A design discussion helps clarify the common goals and the tradeoffs.
Properties with mature planting, distinctive architecture, multiple paths, sloped areas, or several outdoor rooms can create many interdependent choices. The challenge is not simply choosing more fixtures. It is deciding which views and routes matter, how to avoid a disconnected result, and how the plan can adapt to changes in the landscape. Professional input can help organize these decisions and provide an itemized proposal for review before a project moves forward.
Consider a professional option if you prefer to have installation responsibilities and service arrangements clearly discussed before work begins. Ask who will handle the agreed work, what preparation is expected, how controls will be explained, and what process is available if an issue appears later. Avoid assuming a particular response time, warranty, or maintenance inclusion unless the written terms say so. Clear scope matters as much as a polished design.
For an Oregon property, the right provider and scope also depend on the actual service area and the site. CLG presents itself as an Oregon-based, locally owned, design-led outdoor-lighting provider, and proposals are property-specific. Its landscape projects begin at $5,000. A consultation can determine whether the requested project fits the service and establish a realistic scope; the figures in an article alone cannot do that.
How should you evaluate a consultation or proposal?
Use the conversation to find out whether the provider has understood the property and the result you want. Explain the most important views and routes, the way people use the outdoor areas, and any plans for future landscaping or construction. Share the areas you do not want to change. If there are several decision-makers, explain who needs to review the design and what information each person needs.
A helpful proposal should make the project easier to understand. Look for a description of the areas included, the intended treatments, the equipment and controls proposed, and the work that the price covers. Ask how exclusions or future phases are handled. If repairs, maintenance, or ongoing support matter to you, have the provider explain what is offered and what is not. The aim is not to demand the same proposal format from every company; it is to understand the specific agreement well enough to make an informed decision.
Ask how the plan accounts for the property over time. Will fixture locations remain practical as plants grow or beds change? What information will you receive about the system? If a component needs attention, who should be contacted and what should you record? These questions are useful for both residential owners and managers responsible for shared spaces. They make the handoff and future decisions part of the project conversation rather than an afterthought.
For a professional approach, evaluate communication as well as visual ideas. Does the provider listen to your priorities, explain alternatives in plain language, and make clear what is still undecided? Do you understand what you are being asked to approve? Do not feel pressured to accept an unclear scope. A considered decision can include taking time to compare proposals or starting with a smaller defined phase.
Owners who want additional perspective on ongoing care can read outdoor lighting support, care, and repair decisions. When comparing providers, use the same project priorities and questions with each one so that you are comparing similar scopes rather than different assumptions.
How can you plan a phased project?
A phased plan can bridge the gap between doing a small project yourself and hiring a professional for the entire property. Start by defining the desired complete picture, then identify the area that matters most now. For a home, that might be the entry and the route leading to it. For an estate, the first phase could focus on the most-used outdoor living area. For a shared or commercial property, it might be a key arrival zone, subject to the appropriate approvals and property requirements.
Write down what the first phase needs to accomplish and how future work could connect to it. A phase should feel intentional on its own, not like a random collection of fixtures. It should also leave room for later decisions without assuming that a future installation will be identical. If you are working with a professional, ask how the proposed first phase relates to the broader plan and whether the proposal clearly distinguishes current work from possible future work.
If you start with DIY, document the location and details of what you install and keep a record of the effect you are trying to create. Note what works from important viewpoints and what you would change. This information is helpful if you later seek professional advice. It can also prevent a future phase from duplicating work or conflicting with an earlier decision.
For commercial properties, HOAs, and multi-property settings, confirm the approval process and responsibilities before committing to a phase. Identify who is authorized to approve design and budget, who coordinates with landscape or property teams, and who will operate or maintain the system. A well-defined first step can make a larger project easier to assess, but it should not be presented as a guarantee of future pricing, scheduling, or availability.
What common assumptions should you avoid?
First, do not assume that more fixtures automatically create a better result. A lighting plan is a composition, and adding points without a clear purpose can make the scene busy rather than coherent. Decide what is important, review the effect from relevant viewpoints, and allow darker areas to remain part of the design where appropriate.
Second, do not compare DIY and professional options as if they were the same scope. One price may cover a small, self-managed area; another may include a broader design, coordinated installation, equipment, and defined service details. Compare the work, components, responsibilities, and exclusions. If a proposal does not explain those elements, ask for clarification before drawing a conclusion.
Third, do not assume that a product description answers every site-specific question. The property’s layout, existing conditions, intended use, and equipment instructions all matter. Seek qualified advice about requirements that are outside your experience. This guide does not establish code compliance, guarantee a safety outcome, or promise a particular reduction in energy use or costs.
Finally, do not treat a consultation as an obligation to install a complete system. A consultation can be a way to clarify needs, discuss a potential scope, and decide whether a property-specific proposal is useful. For CLG landscape lighting, the project minimum is $5,000; any proposal should reflect the agreed scope and conditions rather than a generic figure. If a request falls outside that minimum or the provider’s service area, ask before assuming the project is a fit.
How should you make the final decision?
Set out the decision in terms of outcomes and responsibilities. Write three short lists: what the lighting needs to accomplish, what you are willing to manage yourself, and what you want another person to handle. The first list could include a clearly visible route, a welcoming entry, or a defined outdoor living area. The second might include researching products, documenting the layout, or making future adjustments. The third could include design coordination, installation planning, or troubleshooting. The lists help reveal whether the main need is creative direction, project labor, equipment guidance, or some combination.
Then set a practical boundary for the first step. A DIY owner might choose one clearly defined area and decide in advance how to evaluate the result. A property owner considering professional work might request a consultation and ask for a written scope before deciding on the project. A commercial or HOA decision-maker may need to confirm internal approval, operating responsibilities, and the people who will review the proposal. A smaller first step is most helpful when it is designed to stand on its own and its relationship to future work is understood.
When comparing options, record the assumptions behind each one. What areas are included? Who is making the design decisions? What equipment and controls are described? What installation or follow-up responsibilities remain with you? Which items are not included? If you cannot answer these questions, the options are not yet clear enough to compare. Ask for clarification rather than making a decision based only on a broad description or a single total.
Finally, consider the time and attention you can realistically give the project. A hands-on approach can be enjoyable, but it takes time to research, plan, install, observe, and maintain. A professional approach can reduce the number of separate decisions you manage, but it still requires you to explain your priorities, review the proposed scope, and approve the work. Choose the process that fits your expectations as well as the look you want. A clear decision made at the beginning makes it easier to judge the finished result and to decide whether another phase is worthwhile.
Frequently asked questions
Can I start with DIY and hire a professional later?
Yes, you can begin with a limited DIY project and seek professional input later. Keep a sketch and notes about the equipment, locations, controls, and intended effect. Be prepared to review the existing work as part of the later conversation; a professional should assess actual site conditions rather than assume that an earlier layout can be extended without changes.
Is professional landscape lighting only for large properties?
No. The decision depends on the project scope and the kind of help you want, not only on the property’s size. A smaller property may still benefit from a coordinated entry and path plan, while a larger property could be addressed in phases. The useful next step is to describe the areas and priorities and ask whether the requested scope is appropriate.
What should I bring to a landscape lighting consultation?
Bring a short list of priorities, questions, and any plans that may affect the landscape. Note the routes people use, the views that matter, and any areas you prefer to leave unlit. Photos or a simple sketch can help explain your goals, but a provider will need to evaluate the property and clarify the actual scope before making a project-specific proposal.
What is CLG’s minimum for landscape lighting?
CLG Outdoor Lighting’s landscape-lighting projects start at a $5,000 minimum project value. Its published $5,000–$50,000+ range is for planning only; the final proposal depends on the property and selected scope. The separate $2,500–$10,000+ planning range applies to permanent Gemstone lighting, not landscape lighting.
Does a professional estimate include future maintenance?
Do not assume that maintenance or repair is included unless the proposal or written terms say so. Ask what ongoing support is available, what kinds of work are covered, and how to request help. If you manage the system yourself, keep records of the layout and equipment so that future troubleshooting begins with useful information.
Discuss your property and request a written estimate
Whether you choose a contained DIY project or professional design and installation, begin with the experience you want after dark, define a clear scope, and make sure the responsibilities and next steps are understood before work begins.