
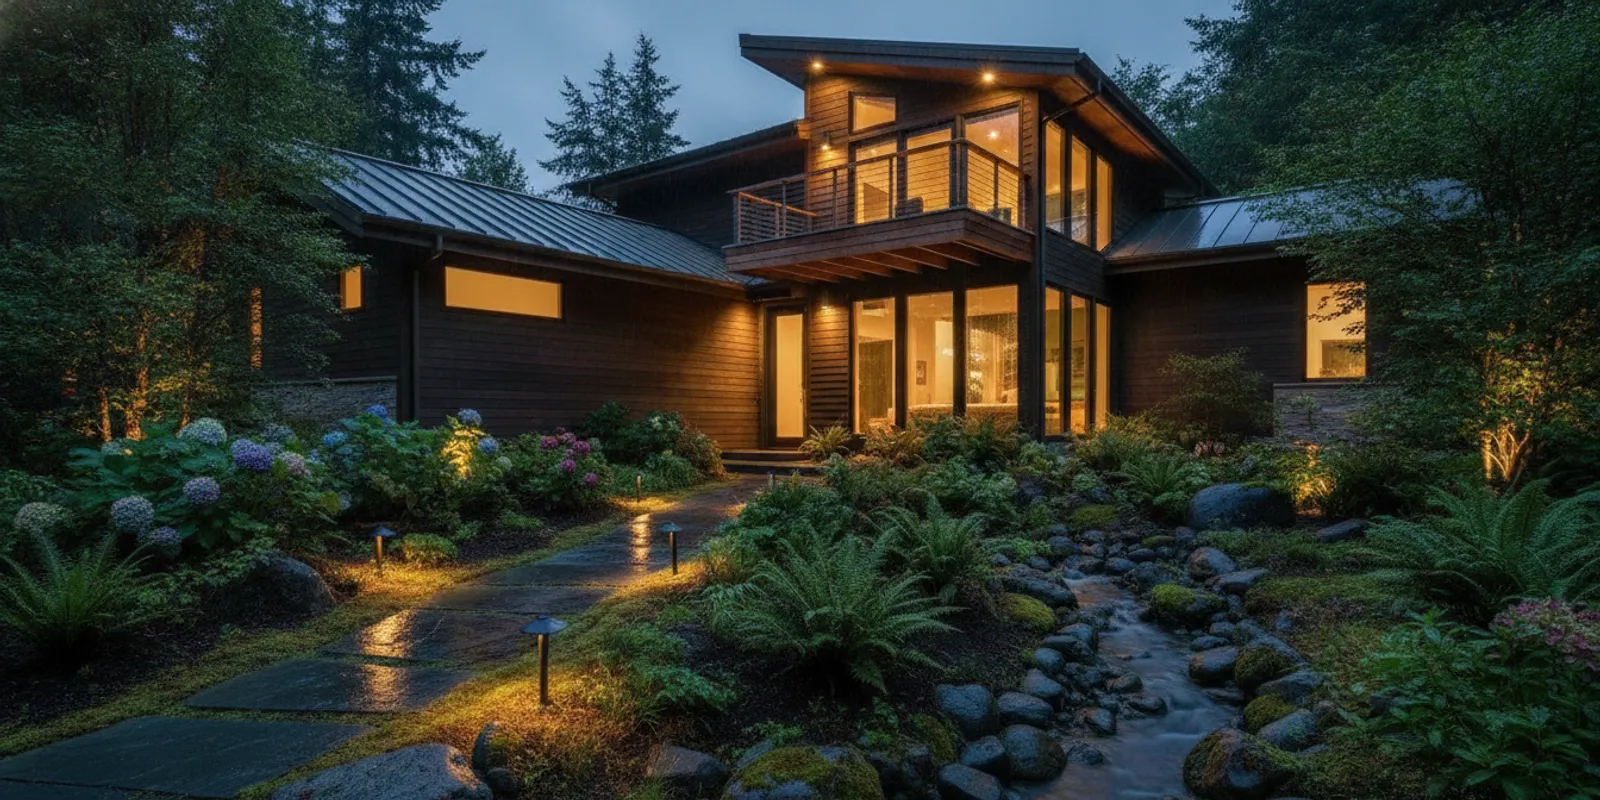
Outdoor lighting safety starts with more than choosing bright fixtures. Placement, connections, glare, weather exposure and maintenance all affect how a system works around a home or managed property. A thoughtful plan aims to make important areas easier to see without shining light into eyes or creating new hazards. This guide covers practical decisions for Oregon properties, while recognizing that each site and installation has its own conditions.
Request a complimentary lighting consultation
What does outdoor lighting safety mean in practice?
Outdoor lighting can support visibility at entries, steps, paths, driveways and work areas. It is not a substitute for sound walking surfaces, handrails, secure gates, attentive driving or other safety measures. Light also cannot make every area risk-free. The practical goal is to help people distinguish edges, changes in level and obstacles while keeping illumination controlled and comfortable.
Begin with how people use the property. A homeowner may focus on the route from parking to the front door. A property manager may need to consider several entrances, shared paths, loading areas, landscape features and maintenance access. A hospitality or retail site may have different operating hours and circulation patterns. Write down the routes and activities that matter before selecting fixtures.
Think in layers. A modest light near an entry can help identify the door, while separate low-level fixtures can define a path. A feature light may add visual depth but should not be mistaken for task lighting. When every fixture is aimed at the same bright point, nearby surfaces can appear comparatively dark. A balanced plan distributes light where it is useful and limits spill.
Where should fixtures go around paths, steps and entries?
Walk the property in daylight and after dark, if possible. Note the places where the route changes: a step, slope, turn, gate, threshold or transition from paving to planting. Also note vegetation, walls and objects that may block a beam. A fixture location that seems obvious on a drawing may be obstructed by a mature shrub or by the way a door opens.
- Paths: Consider the walking line and its edges. Repeated low-level light can help reveal direction, but fixtures need not be placed at every step if that creates glare or visual clutter.
- Stairs and level changes: Aim to make treads and landings legible. Avoid placing a bright source where a person approaching the steps looks directly into it.
- Entries: Light the approach and door area in a coordinated way. Check that a porch roof, column or open door will not create a dark patch or hide the fixture’s useful light.
- Driveways: Consider where vehicles turn, stop and meet a walking route. Keep fixtures out of wheel paths and places where they may be struck by tires, snow or routine yard work.
- Gates and transitions: A small change in light near a latch, gate swing or threshold can help make the route easier to read.
Spacing should follow the shape of the site, not a universal number. A narrow, straight path differs from a curved route bordered by tall plants. The beam spread, mounting height, surface reflectance and nearby fixtures all affect the result. Temporary placement or a nighttime review can reveal whether a proposed point creates a dark gap or an uncomfortable hotspot.
Keep fixtures protected from ordinary contact where practical. A path light pushed into a narrow walking area may become a trip or maintenance obstacle. Consider lawn equipment, pruning, delivery carts, pets, children and snow or debris removal. For more detail on fixture types and placement considerations, see CLG’s guide to Oregon pathway lighting.
How can light improve visibility without creating glare?
More brightness is not automatically better. A bare or poorly shielded source can be uncomfortable when viewed from a path, window, driveway or neighboring property. A strong beam can also create a sharp contrast between a bright patch and its surroundings, making it harder to see beyond that patch.
Start by identifying the viewing angles. Stand where residents, visitors, drivers and staff will approach. Look toward the fixture from each route, and check windows and neighboring sightlines. Shielding, a lower mounting position, a different beam direction or a less intense source may reduce direct glare. The fixture should illuminate the intended surface rather than the eyes of someone using the space.
Use light where a task or route calls for it. A softly lit path may be easier to follow than a series of intense points. At an entry, aim for enough light to distinguish the door, handle and immediate approach, not a flood of light across the entire facade. Keep decorative accent lighting distinct from lighting intended for movement or work.
Color and finish matter too. Pale paving, light-colored walls and wet surfaces can reflect more light than dark planting or textured stone. A layout that appears balanced on dry pavement may feel brighter after rain. Observe the scene from multiple directions and at ordinary operating times. For broader low-glare ideas, CLG’s article on low-glare driveway lighting offers related planning considerations.
What should you consider about wiring and connections?
Wiring choices depend on the system, the site and the work being performed. Do not assume that every outdoor lighting system has the same voltage, components or installation requirements. Follow the equipment manufacturer’s instructions and applicable requirements for the specific work. Where electrical work calls for a licensed professional, use an appropriately qualified person rather than improvising.
For any system, connections and cable routes deserve careful attention. Before digging, identify buried utilities through the appropriate local process. Plan routes that avoid likely damage from planting, edging, mowing, construction and vehicle traffic. Keep accessible components arranged so that they can be inspected and serviced without disturbing unrelated systems.
Look for signs of damage such as cut or crushed cable, loose fittings, exposed conductors, cracked housings, corrosion or water where it should not be. Do not touch damaged wiring or attempt repairs while equipment is energized. If a fixture trips a protective device, behaves unpredictably, smells hot or shows visible damage, stop using the affected circuit if it is safe to do so and contact a qualified professional.
Connections should be suitable for the location and the system, installed according to manufacturer directions and protected from foreseeable moisture exposure. Avoid burying or concealing a connection in a way that conflicts with product instructions or makes inspection impossible. Keep transformers, controls and other equipment accessible, ventilated as directed and away from standing water or likely impact.
Planning should also account for future changes. A new planting bed, path extension or outdoor living area may affect cable routes and fixture locations. If construction or landscaping is planned, coordinate the lighting plan with the relevant trades before surfaces are closed or plants are installed. CLG’s landscape lighting planning guide discusses how site features can shape a layout.
How do Oregon rain and damp conditions affect an outdoor system?
Oregon properties can experience extended wet periods, but exposure varies by location and by the particular site. A sheltered porch, an open garden bed and a low point that collects runoff are not equivalent environments. Choose equipment rated for its intended exposure and install it as directed. A product’s marketing label alone does not establish that it is suitable for every placement.
Before installation, note where water drains, where sprinklers spray and where roof runoff lands. Avoid placing equipment in areas that routinely pond or receive concentrated runoff unless the product and installation are designed for those conditions. Check whether a fixture’s position will be affected by soil movement, mulch buildup, leaf accumulation or repeated irrigation.
After heavy rain, look for standing water around accessible equipment, shifted fixtures, loose covers and unusual operation. Do not open or handle electrical components when conditions are unsafe. If water intrusion, corrosion or repeated outages appear, have the equipment inspected rather than repeatedly resetting or bypassing a problem.
Material selection and maintenance also matter. Soil, moisture and contact between dissimilar materials can contribute to corrosion or deterioration over time. Inspect exposed fixtures and hardware periodically, especially in areas that receive irrigation or have poor drainage. A weather-resistant product still needs correct installation and reasonable care.
Wet pavement changes the visual result. Reflections from a glossy surface can create bright streaks or distract people using a route. When reviewing the system, check it both on a dry evening and, when feasible, after rain. Adjust aiming and shielding to keep reflections from overwhelming the walkway or reaching a neighbor’s windows.
How should managers approach shared and commercial properties?
Shared properties require a broader view than a single front entry. Consider residents, guests, employees, delivery drivers, service crews and people who may not know the site. A route that is familiar to staff can be confusing to a first-time visitor. Start with a simple site walk and map the main arrival points, accessible routes, doorways, shared paths and areas where tasks occur after dark.
Identify who is responsible for operating and maintaining the system. A property manager may need to know which controls serve which zones, when schedules change and whom to contact if part of the system fails. Keep a record of fixture locations, control settings, product information and any instructions supplied with the installation. This helps a new manager or maintenance vendor understand the system without guessing.
For businesses, coordinate lighting schedules with opening hours, cleaning and security procedures. Avoid shining fixtures into occupied rooms or nearby residences. If there are multiple users or tenants, seek input about routes and glare before finalizing the layout. For an HOA or multi-property portfolio, note differences between sites rather than assuming a single design fits every building.
Any proposal should make the scope understandable. Ask which areas are included, what equipment and controls are proposed, how wires will be routed, what surfaces or planting may be disturbed, and how the installation will be reviewed. Clarify which ongoing maintenance is included, if any, and how additional repair work is handled. A property-specific written proposal is more useful than an assumption that every site needs the same number or type of fixtures.
What maintenance helps keep outdoor lighting working as intended?
Maintenance is not only about whether a lamp turns on. A fixture can still operate while it has shifted, become obscured or begun shining into an unwanted area. Periodic observation helps keep the system aligned with current conditions, especially as plants grow and properties change.
- Walk the main routes after dark and note failed, dim, flickering or unusually bright fixtures.
- Check that lenses and shields are intact and clear of leaves, dirt and other buildup.
- Look for fixtures leaning, exposed cable, disturbed mulch, loose hardware or damage from yard work.
- Trim vegetation only as appropriate for the plant and fixture; do not use trimming to conceal an unsuitable placement.
- Review control schedules after seasonal changes and confirm that timers or app settings match how the space is used.
- After landscaping, construction or a storm, check whether fixtures or wiring routes were moved or damaged.
Do not open equipment or make electrical repairs unless you are qualified to do that work and can follow the relevant safety procedures. Keep records of recurring problems. A fixture that repeatedly fails in the same location may point to an exposure, drainage, connection or placement issue that deserves diagnosis rather than another replacement.
Lighting needs can also change. A new tree canopy can block a beam; a remodeled entry can change the approach; a new fence can create a shadow. Reassess the plan when the property changes, instead of simply adding brighter fixtures to compensate. CLG’s overview of outdoor lighting care and repair decisions can help frame questions about ongoing support.
When should you involve a qualified lighting professional?
Consider professional help when the project includes new electrical connections, damaged or unexplained wiring, recurring outages, extensive routes, challenging grades, multiple control zones or coordination with construction. A professional review can also help when you cannot resolve glare, when water repeatedly affects equipment, or when a shared property needs a consistent plan across several entrances.
Ask about the person’s relevant experience and qualifications for the specific work. Request a clear explanation of the proposed design, equipment, wiring approach, controls and work areas. Confirm how the installer will protect planting and hardscape, whether any surfaces may need to be opened, and what the handoff will include. Do not treat a general statement about safety or compliance as a substitute for details about the actual scope.
For an Oregon landscape lighting project, CLG’s published minimum project value is $5,000; the stated indicative range is $5,000–$50,000+, with the final proposal shaped by the property and scope. That figure is not a promise about what a particular design will cost. Fixture selection, access, wiring, controls, site conditions and the extent of work all affect a project-specific estimate. The Oregon landscape lighting guide provides more context on design and care.
Before agreeing to work, make sure you understand what is included, how changes are handled and what support is available after installation. Warranty terms differ by product and by installer; review the current written terms rather than assuming that all components and labor receive identical coverage. Ask how to report a problem and whether routine checks or repairs are part of the agreed scope.
How can you prepare for a property-specific consultation?
A useful conversation begins with the property and the people who use it. You do not need a finished design. A few notes and observations can help the team understand priorities and constraints.
- List the areas you want to address, such as an entry, path, driveway, garden, steps or shared route.
- Describe when each area is used and by whom, including residents, visitors, staff or service providers.
- Point out existing fixtures, controls, outlets or known wiring issues without attempting to test damaged equipment.
- Note irrigation, roof runoff, standing water, steep slopes, mature planting and planned construction.
- Share preferences about brightness, color, visible fixtures and views from inside the property.
- Identify any maintenance or access concerns, including lawn care, snow removal and equipment movement.
At the consultation, ask how the proposed layout addresses visibility and glare together. Ask what assumptions were made about wiring routes and existing site conditions, and what may change after a closer inspection. For managed properties, ask who will receive the controls handoff and how operating instructions will be documented.
CLG Outdoor Lighting describes its work as consultation, design, installation and ongoing support for property-specific outdoor lighting. A complimentary consultation or written estimate is a way to discuss the site and clarify scope; it is not an instant booking or a guarantee of a particular outcome. Use the contact page to start a conversation about the areas you want to review.
How should you decide what to address first?
When a property has several lighting concerns, prioritize the routes and conditions that most affect everyday use. Start with a poorly defined entry, a change in level or a path people use routinely. Then consider secondary areas, landscape accents and controls. This order keeps the plan focused on functional needs before adding decorative effects.
Separate urgent repair concerns from design improvements. Damaged wiring, water intrusion or unexplained electrical behavior should be reviewed promptly by an appropriately qualified person. A fixture that is simply aimed poorly may call for adjustment, but do not assume every fault can be resolved by moving a light. Identify the underlying cause before making changes.
For a larger property, phasing can make the scope easier to evaluate. A first phase might address the main arrival route; later work could extend into garden areas or additional buildings. If choosing phases, plan the overall system so that future work can connect coherently, and confirm how each phase affects wiring, controls and appearance. Avoid a short-term installation that blocks access or creates avoidable rework.
Finally, evaluate the result from the perspective of actual users. Walk the property at night, look toward fixtures from normal approaches, and check how the lighting appears from windows and neighboring areas. Note any remaining dark gaps, harsh reflections or light spilling where it is not wanted. Thoughtful outdoor lighting is an ongoing design decision, not just a collection of fixtures.
Discuss your property’s lighting needs
A careful plan considers people, surfaces, weather and maintenance together, then adjusts to the specific property rather than relying on one-size-fits-all assumptions.
How can a safety walk-through be made useful?
A walk-through works best when it produces observations that can guide decisions, rather than a vague impression that an area feels dark. Choose a normal evening and follow the routes people actually take. If possible, repeat the walk when the property is wet, when business activity is underway or when seasonal darkness changes the hours of use. Do not create a hazardous situation to test a fixture; observe from safe positions and leave electrical inspection to a qualified person.
Bring a simple property sketch or use a printed site plan. Mark entrances, paths, steps, gates, driveways, trees, walls and existing lights. Then note where the route is hard to read, where shadows hide a change in level, and where a bright source is visible directly. Label observations rather than jumping immediately to a product or fixture count. For example, “the latch is hard to locate from the path” is more useful than “add another light,” because the first statement leaves room to consider aiming, shielding, mounting height or a small task light.
Walk each route in both directions. Someone approaching a door may see a fixture differently from someone leaving it. A driver turning into a driveway has different sightlines from a pedestrian walking beside the vehicle. At shared sites, consider a person unfamiliar with the property, not just the regular staff member who knows where every curb and step sits. If an entrance serves visitors with mobility needs, include their route in the review and coordinate any design decisions with applicable accessibility requirements and qualified advice.
Keep the notes specific and repeatable. Record the location, approximate time, weather, direction of travel and what seemed difficult to see. Take photographs only from safe locations and avoid capturing people or private areas unnecessarily. If a problem appears only when a timer changes or after irrigation, record that detail. A pattern is often more helpful than a single observation: for example, a fixture that flickers after rain should be described differently from one that is consistently dim.
What should you observe at an entry?
Check the approach, threshold, door hardware and the area where someone pauses to unlock the door. A porch ceiling may leave the approach dark even though the door itself is bright. A wall fixture may illuminate the house number but cast a shadow across the handle. A decorative tree light may look attractive from the street yet do little for the person walking from the car. Describe each task separately so a plan can balance orientation, visibility and appearance.
What should you observe on a path or stair?
Look for changes in grade, edges, transitions between materials and places where plants spill into the route. Note whether one bright point makes the following section seem unusually dark. On stairs, consider whether the light makes the tread and landing boundaries legible from the direction people approach. Avoid moving or testing fixtures in a way that creates an obstruction while people are using the route.
What should you observe around vehicles and service areas?
Consider vehicle turning paths, parking, pedestrian crossings, delivery access and the places where staff may carry tools or supplies. A light placed for a view from indoors may shine toward a driver or create reflections on a windshield. A fixture near a planting bed may be struck during edging or pruning. Record both the lighting concern and the operational constraint, such as routine cart traffic or landscaping access, before proposing a location.
How do controls and operating schedules affect safety?
A well-placed fixture does not help if it is off when people need it, and a system left at full output all night may create glare or unwanted spill. Controls should match how the property is used. A homeowner may want a predictable evening schedule and a separate way to turn on an entry zone. A commercial manager may need operating periods that reflect opening hours, cleaning, deliveries and staff departure. Decide who can change schedules and how those changes will be communicated.
During handoff, ask the installer to identify each control, zone and ordinary operating mode. If an app is used, confirm which people have access and how settings are changed. Avoid relying on a single person’s memory; keep basic instructions with property records. A future manager should be able to distinguish a scheduled change from a fixture failure and know whom to contact when an issue cannot be resolved through ordinary controls.
Test controls during the handoff under normal conditions. Confirm that the intended zone responds, that other zones are not inadvertently affected, and that any schedule is understandable. If a sensor or timer is part of the design, ask what conditions may affect its operation and what the user should do if it does not behave as expected. Do not bypass safety devices or alter wiring to force a control to work.
For properties with more than one user, define a simple operating policy. For example, a manager might document which zones remain on during business hours, who may adjust seasonal schedules, and how to report a dark route. A homeowner might keep the entry control separate from decorative scenes so a practical setting is easy to select. The precise arrangement depends on the system; the useful principle is to make ordinary operation clear and keep changes traceable.
Changes in use call for a review. A business that changes closing time, a household that begins using a side entrance, or an HOA that alters a shared walkway may need different control schedules. Review both the control settings and the physical layout instead of assuming the original plan still matches current routines.
What should a property manager document?
For a managed property, written records reduce guesswork during a repair or staff handoff. Keep a current plan showing fixture locations and the areas each control serves. Include product information and manufacturer instructions supplied with the installation, along with notes about special operating settings. Store records where the responsible manager or maintenance lead can find them, while limiting access to any account credentials or app permissions as appropriate.
Maintain a simple issue log. Useful entries include the date, location, observed behavior, weather or site condition, any immediate action taken and the person contacted. “North entry light not working after heavy rain; area kept out of use pending inspection” is more actionable than “lights broken.” Do not attempt repairs outside the team’s training. The log helps a qualified professional see whether a symptom is recurring and whether it follows landscaping, weather or construction work.
Before a contractor begins work, identify underground utility information and known site constraints through the proper process. Mark planting that needs protection, routes used by vehicles, irrigation heads and areas where the ground tends to hold water. Discuss who will notify tenants or residents if access is temporarily affected. A clear work plan can reduce avoidable disturbance and help people understand what to expect without promising that every condition is known in advance.
After work is complete, record what changed. Note revised fixture positions, control assignments, replacement components and any instructions about care. If a proposal includes phased work, keep the design intent and future connection assumptions with the records so a later phase does not accidentally conflict with existing routes or controls. A concise, updated record can be more useful than a large folder of unlabelled documents.
How should you compare proposed safety improvements?
When reviewing options, compare what each one is intended to solve, not just fixture quantity or total brightness. One proposal might add several path fixtures. Another might adjust the angle of existing lights, add shielding and address a single dark transition. Ask how each approach affects visibility, glare, property care, wiring access and future maintenance.
| Planning question | Option A: add or relocate light | Option B: adjust or shield existing light |
|---|---|---|
| What problem is addressed? | A persistent dark route, missing task light or changed use may need an added or relocated fixture. | Direct glare, spill or an overly bright hotspot may be improved by aiming, shielding or changing the source. |
| What site effects should be reviewed? | Consider cable routing, digging, planting, hardscape access and possible impact from routine work. | Confirm that adjustment is compatible with the fixture and does not simply move glare to another viewpoint. |
| What maintenance follows? | New equipment adds locations to inspect and may need protection as plants grow or the site changes. | Existing equipment still needs periodic checks for position, lens condition and recurring symptoms. |
| What should the proposal explain? | Ask what equipment, work areas, controls and surface restoration are included. | Ask which settings or parts will change and how the result will be reviewed after dark. |
This comparison is a conversation aid, not a rule that one option is always safer or less expensive. Site conditions, equipment compatibility, wiring, access and the actual source of the problem determine what is appropriate. If there is damaged wiring, water intrusion or unexplained electrical behavior, treat diagnosis as a separate priority rather than comparing design alternatives alone.
Ask for the scope in plain language. It should identify which areas are included, what is being installed or adjusted, what assumptions depend on a site inspection, and how the work will be checked. Ask what is excluded too. A written proposal that explains access, controls, planting or hardscape effects, and maintenance expectations is easier to evaluate than a fixture count without context.
How do changes in planting and site work affect an existing system?
Outdoor spaces are not static. Shrubs mature, tree canopies fill in, mulch is renewed, paths are resurfaced and irrigation patterns change. Each alteration can affect a beam, obstruct a lens, expose a cable or cause a fixture to be struck. Include lighting in conversations about landscaping and construction early enough to protect equipment and preserve access.
Before a planting project, identify fixtures and known cable routes from the available records. Do not assume a cable runs in a straight line between visible components. Use the appropriate utility-locating process before digging and coordinate with qualified trades when the route is uncertain. If a contractor needs to move a fixture, ask how the adjustment will affect its aim, exposure and control zone.
After work, inspect the area visually without opening equipment. Check whether soil or mulch covers a fixture opening, whether a path edge changed, whether irrigation now sprays a lens or connection, and whether equipment has been shifted. If a cable is exposed or damaged, keep people away from it and contact a qualified professional. Do not bury it as a quick fix or assume that an apparently small nick is harmless.
When adding a new feature, consider how it relates to existing light. A new fence may block a beam; a reflective stone surface may create a bright patch; a new seating area may put people directly in the line of sight of a fixture. Review the nighttime scene after the change and record adjustments that are made. A deliberate review is preferable to gradually adding lights without understanding the overall effect.
What are useful questions to ask before installation?
A consultation is an opportunity to clarify both design intentions and practical responsibilities. The following questions help homeowners and managers understand what is proposed without assuming that every property needs the same equipment or layout.
- Which routes, tasks or areas are the main priorities, and how were those priorities identified?
- How will the design make the intended surfaces visible while limiting direct glare and spill?
- What assumptions are being made about drainage, existing wiring, buried utilities, access and future landscaping?
- What equipment is intended for each location, and what manufacturer instructions govern installation and care?
- How will cable routes and connections remain protected and serviceable?
- Which controls operate each zone, and what instructions will the property owner or manager receive?
- What planting, paving or other surfaces may be disturbed, and how will the work area be left?
- How will the system be reviewed at night, and what observations should prompt a follow-up?
- Which maintenance or repair tasks are included in the proposal, if any, and which are separate?
These questions help reveal whether a proposed scope fits the site and the people who use it. They also make it easier to compare proposals on the same basis. If one answer is uncertain because conditions cannot be seen until work begins, ask how that uncertainty will be handled and how any scope change will be discussed before proceeding.
How can a household make a practical evening review?
Homeowners can make useful observations without attempting electrical work. Pick a route that matters, such as the walk from parking to the front door, and use it as a visitor would. Note whether the steps, threshold and door handle are easy to distinguish, whether a light is visible directly, and whether a shadow hides an object. Repeat the walk from the opposite direction and look from inside rooms where glare may be noticeable.
Keep the review modest and consistent. Do not stare into a bright source or walk over an unsafe surface to reach a fixture. If the area is too dark to inspect safely, use another safe route and arrange a qualified review. A phone photograph may help record the general scene, but camera exposure can make a light appear brighter or darker than it looks to the eye; treat it as a note, not a measurement.
Write down what changed since the last review. Perhaps a tree has grown, a fixture has leaned, a pathway has been resurfaced or a timer now switches off before someone returns home. Separate observable facts from proposed solutions. “The garden bed grew over the fixture” is a clear observation; “the system needs twice as many lights” is a conclusion that needs evaluation.
For a persistent issue, share the location and circumstances with the person responsible for the system. Include whether it happens every night or only after rain, whether other fixtures are affected, and whether recent work took place nearby. These details help a qualified person assess the underlying cause and recommend a suitable next step.
How can a business or HOA organize a nighttime review?
For shared sites, plan the review so it does not interfere with normal operations. Choose a representative time, notify the people who need to know and avoid blocking active vehicle or pedestrian routes. If the property has several entrances, review each one rather than assuming that a successful test at the main door proves that every route is adequately considered.
Assign roles. One person can follow the normal visitor route, another can observe the lighting from a safe position, and a manager can record locations and questions. This is not a substitute for a professional assessment; it is a structured way to identify issues that deserve attention. Do not ask staff to handle exposed wiring, climb ladders or inspect energized components.
Think through different users and operating periods. A route used by a delivery driver before opening may not be the same as the route used by a guest at night. A service gate may be opened only occasionally but still needs to be understood by the people responsible for it. Note where lighting controls, schedules or site access procedures complicate the route.
Close the review by assigning follow-up actions. A manager might ask a qualified professional to inspect one damaged fixture, ask the grounds team to avoid an identified cable route, or request a proposal for a poorly defined entrance. Record the responsible person and the next step, and avoid declaring a concern resolved until the relevant action has actually been completed and checked.
What should you do when a fixture stops working?
Start with people, not equipment. If a failed fixture leaves a route difficult to use, tell household members, staff or visitors about the condition and use an alternate route when practical. For a commercial or shared property, follow the site’s ordinary process for notifying users and managing access. A temporary operational decision may be appropriate while a qualified person assesses the lighting, but it does not repair the system.
Observe the symptom from a safe distance. Note whether one fixture or several are affected, whether the failure followed rain, landscaping or construction, and whether there is visible damage. Do not touch a wet or damaged component, open a housing, pull on a cable or repeatedly reset a protective device. If there is a burning smell, exposed conductor, unusual heat, sparking or water in equipment, keep away and contact an appropriately qualified professional; seek emergency help if the situation presents immediate danger.
Share the observations and any available system information with the professional. A record of the location, time, weather and recent site changes can help distinguish a lamp or control issue from a connection, exposure or route problem. Ask what should remain switched off or isolated while the issue is investigated, and follow the professional’s direction rather than improvising.
When service is complete, ask what was found and whether anything should be monitored. If the same failure returns, report the recurrence instead of treating each event as unrelated. A recurring fault may call for a closer look at site exposure, drainage, equipment suitability or installation details.
How do you distinguish a lighting concern from a broader site concern?
Some observations point beyond the lighting system. Uneven paving, a loose handrail, poor drainage, a gate that does not latch or a path narrowed by planting may remain a concern even if illumination is improved. Record these separately and refer them to the appropriate property professional. Lighting can help people see a feature; it cannot correct the underlying condition.
For example, if a step is hard to identify because its edge is damaged or the approach is uneven, a light adjustment may improve visibility but will not restore the surface. If water regularly pools across a route, a fixture is not a drainage solution. If a door opens into a path, brighter light does not change the door swing. A sound plan recognizes the interaction between illumination and the physical environment.
Likewise, a bright scene can still be hard to navigate if the beam creates glare or the route has no clear visual hierarchy. Ask whether the intended task is visible from the actual approach, not merely whether the property looks bright from the street. Review with the relevant trades or property manager when a concern involves both lighting and construction, access or maintenance.
Keeping these distinctions clear leads to more useful proposals. It prevents a lighting change from being presented as a complete remedy for a separate building or landscape issue and helps each concern reach the person equipped to address it.
How should lighting be reviewed through the seasons?
Seasonal conditions change what people see and how equipment is exposed. A summer inspection may take place under a dense canopy and dry soil, while a winter evening may bring rain, fallen leaves, earlier darkness and different patterns of use. Review key routes at appropriate intervals and after meaningful site changes rather than relying on a single annual impression.
In wet periods, look for standing water, runoff paths, leaf buildup and reflections on paving. In growing seasons, check whether foliage has obscured a beam or begun to press against a fixture. After pruning, construction or a storm, note whether equipment has shifted or a cable route may have been disturbed. Do not move or open electrical components as part of a casual seasonal check.
Control schedules deserve seasonal attention too. A timer that once aligned with household routines may no longer match them as daylight hours change. Confirm schedules using the controls and instructions for the specific system. For shared properties, document who may make changes and communicate them to the relevant users.
Keep a short record of observations by date. Over time, this can show whether a problem is tied to a season or a particular activity. It also gives a professional more context if an intermittent issue needs diagnosis. Seasonal review should remain practical: focus on routes, equipment condition, controls and changes that affect how the property is used.
How can a project remain clear from proposal to handoff?
A safe, manageable project depends on shared understanding before, during and after installation. Before work begins, confirm the areas included, the intended purpose of each lighting zone, likely cable routes, access needs and any assumptions about existing site conditions. Confirm how changes will be discussed if the actual conditions differ from what was visible during planning.
During the work, communicate about planting, paving, irrigation, vehicle access and other activities that could intersect with the installation. The people doing the work should understand the property’s operating constraints, and the property representative should know how to raise a concern. Keep any required site access or work-area precautions aligned with the actual work and the responsible professionals’ instructions.
At handoff, review the installed locations and controls with the person who will operate them. Ask for product instructions, available system records and a clear explanation of who to contact about a malfunction. Walk the main routes after dark when the work and conditions permit, and note any question that needs follow-up. A nighttime review should focus on actual use, glare, visibility and operation rather than simply confirming that every lamp turns on.
For a multi-property manager, use a consistent record format while preserving site-specific details. A standard checklist can make it easier to compare entrances and assign maintenance, but it should not force identical fixture layouts across properties with different grades, materials, exposure or users. Consistent documentation and property-specific decisions can work together.
What is the practical next step?
Begin by identifying the route or operating condition that matters most, then record what you can safely observe. Separate visibility concerns from glare, equipment damage, drainage and physical surface issues. This simple distinction helps determine whether the next action is a design discussion, routine maintenance, a repair assessment or help from another qualified trade.
For homeowners, that may mean noting the approach to the front door, a dark stair or a fixture that shines toward a window. For a manager, it may mean mapping shared routes, documenting control zones and assigning responsibility for recurring checks. In either case, a property-specific conversation should address how people use the site, what equipment is present, what constraints exist and how the system will be maintained.
CLG Outdoor Lighting offers consultation, design, installation and ongoing support for property-specific outdoor lighting. Landscape lighting projects have a $5,000 minimum project value; the scope and proposal depend on the property and work involved. A conversation can help clarify whether the requested work fits the service and what information is needed for a written estimate.