
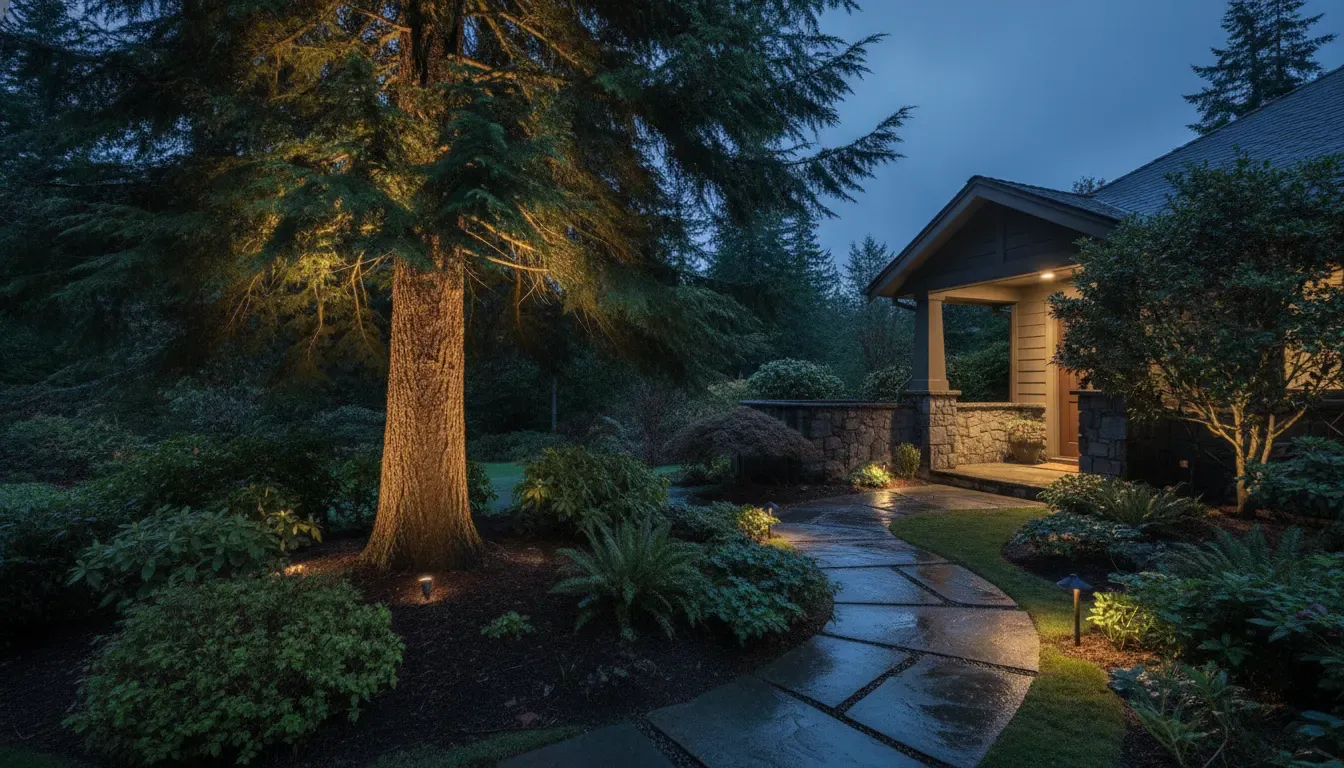
When comparing uplighting vs downlighting outdoors, the fixture position changes more than the direction of the beam. It changes what becomes the visual focus, where shadows fall, how much of a fixture is visible, and how the property feels from the approach, the street, or an outdoor living area. Uplighting sends light upward from a lower position. Downlighting places the source above the area being illuminated and directs light downward. Neither approach is automatically the right choice for every property. The useful question is which direction supports the feature, viewing angle, access plan, and nighttime composition you want.
CLG Lighting plans that choice as part of a landscape lighting design for the property, not as a catalog swap. A written proposal follows an on-site review. Indicative landscape lighting projects are often planned from about $5,000 to $50,000 or more, with a $5,000 minimum. Scope, fixtures, access, controls, wiring, and service details decide the figure. That range is a planning guide, not a quote.
Request a consultation for a property-specific lighting plan
Uplighting vs downlighting outdoors at a glance
Uplighting and downlighting can both be part of a carefully layered design, but they solve different planning problems. Use the comparison below as a starting point rather than a fixture prescription. Final placement depends on the height and character of the feature, nearby surfaces, sightlines, wiring, controls, and how the space is used after dark.
| Consideration | Uplighting | Downlighting |
|---|---|---|
| Typical source position | At or near the ground, aimed upward. | Above the feature or area, aimed downward. |
| Visual emphasis | Trunks, canopies, columns, walls, and vertical texture. | Ground planes, planting, paths, patios, and layered shadows. |
| Fixture visibility | Often easier to see unless screened or carefully positioned. | May recede from normal sightlines, but elevated hardware can need more planning. |
| Service planning | Usually reachable from the ground, subject to planting and property access. | May require a safe access plan for elevated fixtures or tree locations. |
| Common design role | Accent, texture, vertical composition, and focal-point lighting. | Soft area illumination, canopy effects, and shadows that fall across the space. |
How uplighting changes a property after dark
Uplighting begins close to the surface or feature it is intended to reveal. The beam travels upward, so the eye often follows the vertical line from the fixture to the trunk, branches, wall, column, or architectural edge. That direction can make a tall feature part of the nighttime composition instead of leaving it as a dark outline.
On a mature tree, an uplight can draw attention to trunk form, branching structure, or the texture of the bark. A wider distribution may support the canopy, while a more controlled beam can isolate a sculptural branch or a specific portion of the tree. The goal is not to make every tree equally bright. It is to decide which trees should carry visual weight and how they relate to the entry, windows, path, and outdoor rooms.
Uplighting can also support masonry and architecture. A fixture placed near a stone retaining wall, brick column, entry pier, or textured façade can reveal changes in the surface as the beam travels across it. Small shifts in distance, aiming, and beam spread can change whether the result feels like a soft wash, a more directional accent, or a grazing effect that emphasizes texture.
Because the source is closer to eye level, uplighting requires deliberate glare control. A fixture can be well aimed at the feature but still feel uncomfortable from a nearby walkway, window, driveway, or seating position. Concealment behind planting, careful orientation, shielding, and appropriate output are part of the design, not afterthoughts. A nighttime walk-through from the important viewing angles helps identify problems that are not obvious from a plan view.
Where uplighting tends to work well
Trees and specimen planting
Uplighting is a natural candidate for a tree that deserves emphasis. It can describe the trunk and lower canopy while preserving darker areas around the property. For a small ornamental tree, one carefully placed source may be enough to show its form. A broader or more layered arrangement may be appropriate for a larger tree, but adding fixtures is not a substitute for deciding what the viewer should notice first.
Planting beds also benefit when the light is aimed at a deliberate focal point rather than scattered across every plant. A specimen shrub, sculptural grass, or distinctive planting mass can anchor the composition. Seasonal growth matters, too. The fixture position should leave room for maintenance and should not depend on foliage staying exactly as it looked on installation day.
Walls, columns, and entry features
Ground-level uplighting can give an entry wall or column more presence without flooding the whole façade. It can help connect an arrival path to the front door by repeating a material, line, or warm light tone. On a stone or brick surface, placement is especially important because a slight change in angle can reveal texture or produce a flatter appearance.
Focal points viewed from a distance
When a feature is primarily seen from a driveway, front walk, or across a garden, uplighting can establish a readable vertical focal point. The fixture should be aimed with the actual viewing position in mind. A composition that looks balanced from the front door may look overly bright or expose the source from the street. Multiple nighttime viewpoints are useful before final aiming.
How downlighting changes the experience of an outdoor space
Downlighting works from above. The fixture directs light toward the ground, planting, steps, path, deck, patio, or other surface below. Since daylight and moonlight generally come from above, this direction can create familiar shadow patterns. Branches, railings, leaves, and architectural elements may cast shadows across the ground, giving the space a more dimensional appearance than a uniformly bright surface.
A downlight can be mounted on a building, a structure, a purpose-designed post, or another suitable elevated location. In a tree, a carefully planned downlight can create a moonlighting effect across planting or a path. The effect depends on the height, beam control, surrounding branches, the angle from the viewing area, and the amount of ambient light already present. It is better treated as a composition to test than a result you can assume in advance.
Downlighting can also reduce the visual prominence of fixtures when the source is above normal eye level. That does not mean the fixture disappears from every angle. Mounting hardware, wire routing, service access, and glare still require attention. A source that is hidden from a patio can be visible from an upper window or a neighboring approach, so the lighting plan should account for the property as it is actually occupied.
Where downlighting tends to work well
Paths, steps, and arrival routes
Downlighting can place light on a route without making every fixture the focus. From an appropriate elevated position, the beam can cover a section of walkway or steps while allowing the surrounding planting to remain part of the scene. The path still needs its own design logic. A downlight is not automatically a replacement for dedicated path fixtures, especially where there is no suitable elevated mounting point or where the route changes direction.
Steps and changes in grade deserve particular attention. The light should help reveal the transition without producing sharp glare at the eye. The right solution may combine a downlight with low-level markers or carefully placed accents. The purpose is to make the route readable within the overall composition, not to turn it into a bright corridor.
Patios, decks, and outdoor living areas
Outdoor rooms often need softer, broader light than a feature tree or façade. Downlighting from a roofline, pergola, structure, or other appropriate position can create a pool of light over a seating or dining area while keeping the fixture less prominent. The plan should account for where people sit, where they look, and whether the beam crosses a line of sight.
Outdoor living areas also change during use. A table may move, a canopy may be added, or a planting screen may grow. Controls and scenes can help the lighting adapt, but the physical placement still needs to make sense for the space. A consultation should distinguish between light needed for navigation, light that supports a task, and light intended to shape the atmosphere.
Canopies and layered planting
In a suitable tree or structure, downlighting can place overlapping shadows across lower planting and hardscape. This can add depth without lighting every surface directly. Tree-mounted applications need a careful installation and service plan. Avoid improvised attachments or wiring approaches that can damage the tree or create unsafe future access. The property owner should understand how elevated fixtures will be inspected, adjusted, and serviced later.
Uplighting for walls and downlighting for paths: matching direction to the feature
When deciding between uplighting and downlighting outdoors, start with the feature rather than the fixture. A vertical wall, column, tree trunk, or specimen plant often benefits from light that rises across its form. A horizontal surface, route, seating area, or planting bed may benefit from light that falls across it. That is a useful first filter, but it is not a rule that applies in every situation.
For a broad wall, a narrow uplight may create isolated bright spots instead of a coherent architectural layer. A wider distribution, a different mounting position, or a wall-wash approach may be more suitable. For a path beside a mature tree, the tree might receive uplighting while the walking surface receives a separate downlight or path light. The two directions can work together because they have different jobs.
At an entry, a downlight may help reveal the threshold while an uplight gives a column or nearby tree visual structure. At an outdoor kitchen, downlighting can support the work surface while a restrained uplight gives the surrounding planting definition. The question is not whether one method is better in isolation. It is whether each source contributes something distinct without competing for attention.
Glare control, spill, and nighttime composition
Good outdoor lighting is judged from the places people actually spend time. Check the approach from the driveway, the front walk, the street-facing view, the main windows, and the seating areas. Look for direct views of bright sources, reflections in glass, light entering rooms where it is not wanted, and bright patches that make nearby areas feel darker by comparison.
Uplights are more likely to be encountered near ground level, so shielding and aiming are central. Downlights can move the source out of the normal eye line, but their beams may reach farther across a property. Both approaches need controlled output and a clear target. Aiming beyond a tree canopy, wall edge, or path can send light into areas that were not part of the design.
Composition matters as much as individual fixtures. A property usually feels more considered when the eye can move between a few intentional layers: arrival, architecture, planting, and living areas. Dark space is part of that composition. Leaving some areas unlit can preserve depth and keep the most important features from competing with one another.
Controls can support this approach by allowing different scenes for arrival, entertaining, seasonal use, or late-night operation. The settings should follow the property and the owner’s routine rather than assume that every zone needs to be on at full output all evening. CLG’s outdoor lighting support guide covers planning questions around controls, maintenance, repairs, and future changes.
Installation and future service considerations
Fixture direction is only one part of a workable plan. Before installation, consider where wiring will run, how fixtures will be protected during landscape work, how planting will mature, and whether the source can be reached for cleaning, aiming, and repair. A ground-mounted uplight may be easy to reach but vulnerable to changing beds or routine yard work. An elevated downlight may be visually discreet but require a more involved access plan.
Property care should be discussed alongside appearance. The plan may need to account for irrigation, pruning, leaf accumulation, snow or ice in some areas, drainage, retaining walls, and access around gates or structures. These details affect how a fixture performs and how straightforward future service will be. They also affect what a written proposal should include.
For a broader look at the planning process, review CLG’s lighting design and installation process. A property-specific review can identify which features should be emphasized, where a source can be placed responsibly, what control approach fits the routine, and which areas should remain intentionally quiet.
Can uplighting and downlighting be combined?
Yes. Combining the two approaches can create depth when each fixture has a defined role. One possible arrangement is an uplight at a mature tree to establish vertical form, paired with a downlight over a nearby path or patio to support movement and use. Another may use an uplight at a stone entry feature and a carefully controlled downlight to shape the steps or threshold.
Layering does not mean adding every technique to every zone. Too many sources can flatten the contrast that makes a landscape interesting. Start with the property hierarchy: what should be noticed first, what should guide movement, what should support a task, and what should simply provide a quiet background. Then select the direction and fixture position that supports each layer.
A combined plan also needs consistent color, output, beam control, and timing. A warm, restrained approach may connect the different zones more effectively than making each fixture as bright as possible. The final result should be evaluated from several viewpoints after dark, with adjustments made before the design is considered complete.
How to choose the right approach for your property
Use these questions to prepare for a lighting consultation:
- Which features should carry the most visual weight after dark: trees, architecture, entries, paths, or outdoor rooms?
- Where will the property be viewed from, and where do people actually sit, walk, arrive, or look through windows?
- Is there a suitable elevated mounting location for downlighting, with a realistic plan for future service?
- Would a ground-level uplight reveal a feature, or would its source create glare from an important viewpoint?
- Which routes need functional guidance, and which surfaces should remain darker for contrast?
- How might planting, pruning, structures, furniture, or property use change over time?
- Would scenes or scheduling help the lighting serve different routines without requiring every zone to operate together?
Photos, a rough property plan, examples of areas you like after dark, and notes about current fixtures can make the conversation more useful. If an existing system is being revised, identify which fixtures work, which areas feel too bright or too dark, and whether the issue is placement, aiming, controls, wiring, or a change in the landscape.
Frequently asked questions
Is uplighting or downlighting better for trees?
It depends on the tree’s form, the intended viewpoint, the surrounding features, and the available mounting and service options. Uplighting can emphasize the trunk and canopy from below. Downlighting can create shadows across planting or hardscape from an elevated position. Some properties use both, with each direction assigned a different visual role.
Which approach is better for a walkway?
Neither direction is automatically a complete walkway solution. A downlight from a suitable elevated position may illuminate part of a route, while path fixtures may provide more predictable low-level guidance where no elevated mounting point exists. Uplighting is often better used to highlight the trees, walls, or planting beside the path rather than the walking surface itself.
Does downlighting always look more natural?
Downlighting can create familiar overhead shadows, but the result depends on height, beam control, surrounding materials, and the amount of ambient light. Poorly placed downlighting can still create glare or harsh patches. A nighttime review is needed to determine whether the effect fits the property.
Are uplights easier to maintain?
Ground-mounted fixtures are often easier to reach than elevated fixtures, but access still depends on planting, hardscape, irrigation, and the final location. Elevated downlights require a clear plan for inspection and service. Maintenance should be considered during design rather than after the system is installed.
How do I get a recommendation for my property?
A lighting professional can review your property’s features, viewpoints, access, existing infrastructure, controls, and intended use, then recommend a layered plan. The landscape lighting service page provides more context on design-led landscape applications. For the next step, request a consultation and written estimate so the scope can be reviewed for your specific property.
Request a property-specific outdoor lighting consultation.
Whether the starting point is a dark entry, a mature tree, a path that needs clearer definition, or an outdoor room that feels disconnected after sunset. A sound plan begins with the property and the way it is used. Uplighting and downlighting are tools within that plan. When fixture direction, glare control, access, controls, and future service are considered together, each light can contribute to a balanced nighttime composition.