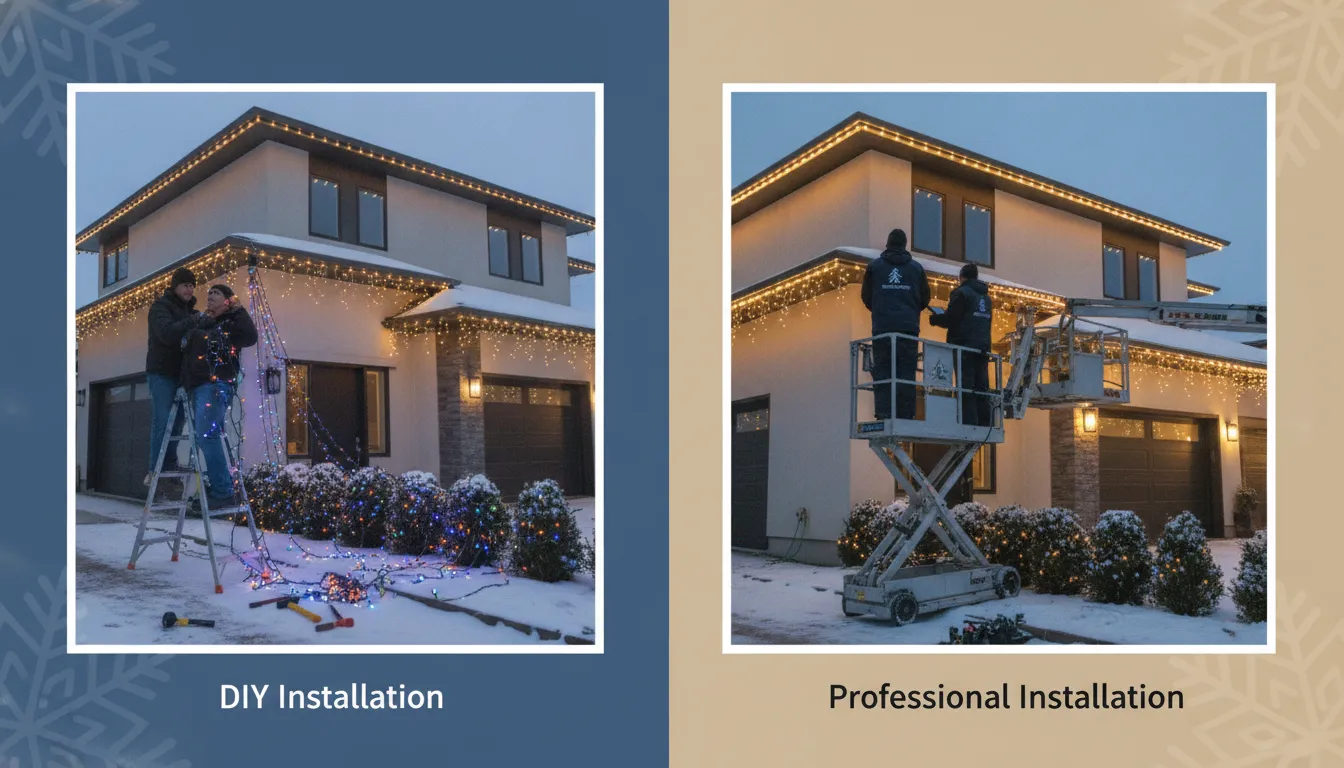
Choosing holiday lights should feel fun, not like a season-long project you dread. But before you buy strands or book an installer, think about the work involved: planning the display, reaching rooflines, checking cords, fixing outages, and taking everything down. DIY vs professional Christmas light installation for homes comes down to more than the upfront price. Your home’s layout, your comfort on a ladder, and the time you can spare all matter. A simple porch display may be easy to manage yourself, while steep rooflines or tall trees can make professional help a practical choice. Here’s how to compare the options and find the right fit.
Key Takeaways
- Choose based on the display and your comfort with the work: DIY suits simple, easy-to-reach areas; consider a professional for steep rooflines, tall trees, or challenging access.
- Compare costs across the full season: Count materials, equipment, electricity, time, repairs, takedown, and storage, not just the initial installation price.
- Clarify safety and service details before starting: Use outdoor-rated lights and cords, or ask providers what their quote includes for installation, maintenance, repairs, and removal.
DIY or Professional Christmas Light Installation: Which Is Right for Your Home?
The right choice depends on your display, your comfort working at height, and how much time you want to spend on installation and removal. A small, ground-level display may be manageable as a DIY project. A more involved roofline or landscape design may call for an experienced installer. Consider the full season, including planning, repairs, takedown, and storage, before deciding.
DIY benefits: lower upfront cost, flexible timing, and hands-on design
Installing Christmas lights yourself can suit a simple display, a limited budget, and a homeowner who is comfortable with the work. You can choose when to install, shop for products at your own pace, and adjust the design as you go. DIY also gives you direct control over colors, placement, and which parts of your home to highlight.
The savings come mainly from avoiding labor costs, though lights, clips, extension cords, and tools still add to your budget. Measure the areas you want to decorate and make a plan before shopping. DIY options can cost less upfront, especially for modest displays, but compare material costs with the time and effort you’ll put in.
DIY challenges: planning, equipment, troubleshooting, and takedown
A DIY display takes more than hanging strands. You’ll need outdoor-rated lights, suitable clips, safe access to each installation area, and a plan for routing cords to outlets. Test every strand before hanging it, and allow time to troubleshoot if a section stops working or the display needs adjustments.
The work continues after the holidays, when you’ll need to take down, sort, and store the lights. Common errors include using indoor lights outside, overloading circuits, and attaching lights with nails or staples. Review these common Christmas light installation mistakes before starting. If the project involves a steep roof, hard-to-reach eaves, or equipment you don’t have, consider whether the time and safety demands make DIY the right fit.
Professional benefits: experience, efficient installation, and seasonal support
A professional installer can help shape a display around your home’s roofline, architecture, trees, and landscaping. Experienced crews bring the tools and access equipment needed for the job, and they can install lights with consistent spacing and a coordinated look. You can share your preferences and let the team handle the physical work.
Ask what support is available once the lights are installed. Some providers include troubleshooting or repairs during the season, while others charge separately for service calls. Professional installation can also be a practical choice when working at height feels unsafe. Trained installers follow safety practices for holiday lighting work. Before booking, confirm the provider’s service area, schedule, and plan for handling issues during Oregon’s winter weather.
Professional trade-offs: higher upfront cost and less direct control
Hiring a professional generally costs more upfront than installing lights yourself. The estimate may cover labor, lighting materials, and access equipment, but services vary. Takedown, repairs, replacement bulbs, and storage may be included or priced separately. Ask for a written quote that lists the full scope, so you can compare packages rather than installation prices alone. Christmas light installation services can vary, so check what each estimate includes.
You’ll also have less hands-on control over the installation process. Share photos, measurements, preferred colors, and areas you want to feature before work begins. Ask how the installer handles design changes and whether adjustments affect the price. A clear plan helps the finished display reflect your preferences while keeping expectations, timing, and costs in focus.
How Do DIY and Professional Installation Costs Compare?
The lowest upfront price may not be the lowest cost for the season. To compare DIY and professional Christmas light installation, count materials, labor, equipment, repairs, takedown, and storage. The right choice depends on your display, your available time, and how much of the work you’re comfortable doing yourself.
DIY costs: lights, clips, cords, tools, electricity, replacements, and storage
DIY materials can cost about $50 to $500, depending on the size of your display and the lights you choose. Include clips, extension cords, timers, and any tools you need. You’ll also pay for electricity and may need to replace damaged or failed strands. After the season, you’ll need a dry place to store your lights and supplies.
Time is another cost to consider. Planning, shopping, installing, and troubleshooting can take 14 to 25 hours per season. If you value your time at $25 per hour, that’s an additional $350 to $625 in labor value. Govee’s cost guide outlines common DIY expenses. Add up your likely purchases and time before assuming DIY will cost less.
Professional pricing: display size, roofline complexity, materials, and service scope
Professional installation costs depend on the size of your display, the complexity of your roofline, the materials used, and what the service includes. One estimate puts typical costs between $218 and $663, with an average of $437. Labor alone may cost about $2 to $5 per linear foot. If the installer supplies the lights and materials, the rate may be $5 to $10 per foot. Lighting a 12- to 18-foot tree may add $125 to $250.
Treat these numbers as general estimates, not a guaranteed quote. A straightforward roofline usually requires less work than a large home with steep or detailed roof sections. Ask whether the estimate includes lights, installation, repairs, and removal. Bob Vila’s cost guide explains how project details can affect pricing.
Include time, equipment, repairs, removal, and storage
A DIY budget should cover the whole season, not just the cost of lights and installation. Consider whether you need to buy or rent a ladder, how long setup and troubleshooting may take, and what it will cost to replace strands. Include the time and effort required to take down the display and pack it away safely.
Professional services may save time and include equipment for reaching rooflines. Some providers also offer maintenance or repairs if lights stop working, but service terms vary. Ask whether repair visits cost extra, and whether takedown and storage are included. This guide to Christmas light installation explains how equipment and service support can factor into the decision.
Compare full-season costs, not just installation prices
For a fair comparison, list costs from setup through storage. A basic professional display may start around $300, while permanent smart lighting systems can cost $5,000 or more. These systems are a different investment from seasonal lights, so consider how long you plan to use them and what maintenance they may need.
For seasonal lighting, check whether a professional quote includes the lights, installation, repairs, removal, and storage. Then compare it with your DIY costs for materials, equipment, electricity, replacements, and time. Ware Landscaping’s cost overview shows how project scope can affect pricing. A written estimate makes it easier to compare services and understand what you’re paying for.
What Safety Risks Should DIY Installers Consider?
Christmas light installation can involve ladders, roof edges, electrical connections, and wet or windy weather. Before you begin, plan how you’ll reach each area, power the display, and take it down. If the work feels unsafe or you can’t reach a spot without stretching or stepping onto a roof, leave it to a professional.
Watch for ladder falls, roof access, steep pitches, and hard-to-reach areas
A fall from a ladder can cause serious injury, even from a short height. Before setting up, check whether you can reach the roofline, dormers, and trees safely from the ground. Don’t climb onto a steep or icy roof, stand on the ladder’s top step, or lean far to one side. Move the ladder instead. If the job requires roof access or places a ladder near a doorway, driveway, or uneven ground, consider hiring an installer. The Consumer Product Safety Commission’s ladder guidance covers basic precautions for selecting and using a ladder.
Avoid electrical hazards from damaged cords, wet connections, and overloaded circuits
Rain and moisture can make damaged cords or exposed connections dangerous. Keep plugs and connections off the ground, and use covers designed for outdoor electrical connections. Don’t run cords through puddles, under rugs, or where people may step on them. Follow the manufacturer’s limit for connecting light strings, and avoid overloading outlets or circuits with lights and other decorations. If a breaker trips, don’t keep resetting it or add another extension cord. Turn off the display and identify the cause first. The National Fire Protection Association’s holiday safety guidance offers advice for reducing fire risks from seasonal decorations.
Check for damage and use outdoor-rated lights
Inspect each strand before you hang it. Look for frayed or cracked insulation, exposed wires, broken sockets, loose connections, and bulbs that don’t work. Set damaged strands aside for proper disposal rather than patching them for outdoor use. Check the product label to confirm the lights are rated for outdoor conditions. Indoor-only products may not be designed to withstand rain or dampness. When replacing bulbs, use the type and wattage specified by the manufacturer. Also check plugs and extension cords, since damage there can create the same risks as a faulty light strand. The Electrical Safety Foundation International’s decorating advice explains what to check before setting up seasonal lights.
Use GFCI-protected outlets and follow limits for connected light strings
Plug outdoor lights into outlets protected by a ground-fault circuit interrupter, or GFCI. A GFCI can cut power if it detects an electrical fault, helping reduce the risk of shock. If your outdoor outlet isn’t GFCI-protected, ask a qualified electrician about a suitable solution instead of improvising. Read the instructions for every light set to find the maximum number of strands that can be connected end to end. Limits vary by product, so don’t assume that LED lights can be connected without restriction. Use extension cords rated for outdoor use, and keep plugs and connections protected from moisture. Before switching on the display, check that cords aren’t pinched, stretched, or tangled.
Set ladders on stable ground, keep three points of contact, and avoid wet or windy conditions
Set the ladder on firm, level ground, and follow its setup instructions. Keep three points of contact while climbing, such as two hands and one foot. Don’t lean beyond the ladder’s sides; climb down and reposition it instead. Oregon’s rainy weather can leave pavement, soil, and ladder rungs slippery, so postpone the work if surfaces are wet or winds are strong. Don’t climb while holding lights or tools in your hands. Use a tool belt or have someone pass supplies up once you’re safely in position. If the ladder wobbles, sinks, or can’t be placed securely, stop and choose another approach.
Use outdoor clips, not nails or staples, and keep cords clear of walkways
Use clips designed for outdoor lights to attach strands to gutters, shingles, or other surfaces. Nails and staples can puncture wire insulation, damage roofing, or loosen as temperatures change. Choose clips that fit the lights and the surface, and follow the product directions so strands stay secure without being pulled tight. Route cords along the edges of the home rather than across steps, paths, or driveways, where someone could trip or a vehicle could crush them. Keep plugs away from standing water and spots where rain or snow runoff collects. Before turning on the display, walk around the area to check that cords and lights are secure and out of the way.
Choose LED lights and timers, and turn off unattended displays
LED strands generally use less electricity and produce less heat than traditional incandescent lights, but they still need careful installation. Choose lights and timers labeled for outdoor use, and follow the manufacturer’s instructions. A timer can switch the display off overnight or while you’re away. Unplug lights before adjusting strands or replacing bulbs. Check cords, connections, and outlets regularly, since a timer doesn’t make damaged equipment safe. Keep lights away from dry leaves, wreaths, and other materials that can catch fire. Turn off the display if you notice flickering, unusual heat, or a burning smell, and don’t use the lights again until you’ve addressed the problem.
Hire a professional when height, weather, or roof complexity makes DIY unsafe
Steep roof pitches, multiple roof levels, tall trees, and hard-to-reach gables can make a DIY installation risky. Stop if the work requires stepping onto a roof, working near overhead power lines, or setting a ladder on uneven or slick ground. A professional installer can assess access, choose suitable materials, and plan how to secure and power the display. Ask what the service covers before booking, including installation, in-season maintenance, troubleshooting, and removal. If you’re unsure whether an area is safe to reach, don’t test it from a ladder. Contact an experienced outdoor lighting provider to discuss the home’s layout and the support you need.
How Do Design, Materials, and Results Differ?
The difference between a DIY display and a professionally installed one often comes down to planning, product choices, and finishing details. Before you hang a single strand, consider how the lights will suit your home and look from the street.
Plan colors, patterns, focal points, and an overall look
Decide what you want people to notice first. You might outline the roof and porch in warm white, add color to a front-yard tree, or repeat the same pattern along the eaves. Keeping the display to a few colors and focal points can help it feel cohesive rather than crowded.
Sketch your ideas or take a photo of your home and mark the areas you want to light. Estimate the lengths you’ll need, then choose bulbs and spacing that work together. This holiday lighting planning guide can help you map out the display before installation begins.
Match lights to rooflines, architecture, trees, and landscaping
A well-planned display complements your home instead of competing with it. Follow rooflines and architectural details for a crisp outline, then use trees, shrubs, or pathways to add depth. A few carefully lit evergreens, for example, can balance a bright roofline without covering every part of the yard.
Think about scale, too. A large tree may need more lights for even coverage, while a small porch may look best with a simple outline. Consider the view from the street as well as from inside your home. This guide to choosing areas for holiday lights offers ideas for bringing rooflines and landscaping together.
Compare retail and professional-grade materials for fit, appearance, and durability
Retail lights can suit a simple project, but you may have fewer options for bulb spacing, color consistency, or strand length. Professional-grade products often offer more flexibility for fitting rooflines and architectural details. Durability varies by product, installation, and exposure to the elements, so check the specifications rather than relying on the label alone.
Look for lights and cords rated for outdoor use. Compare bulb type, spacing, color, and replacement availability. If you hire an installer, ask which products they use and why they suit your home. A professional can also explain how the lights attach to different surfaces and whether seasonal maintenance or replacements are included.
Test each strand before hanging and arrange cords neatly
If you’re installing lights yourself, plug in every strand before you hang it. Testing first helps you catch damaged cords or bulbs that aren’t working while the lights are still easy to inspect. This guide to testing Christmas lights covers a quick step that can save you from taking down a section to fix a problem later.
As you install, keep lines straight and connections discreet. Use outdoor-rated clips suited to the surface, and route cords away from walkways, doors, and places where water collects. Avoid nails and staples, which can damage wiring or your home’s exterior. A professional installer can select the right attachment method for each area.
Consider energy use, replacements, and how the display looks after dark
Your choice of lights affects electricity use and the upkeep your display may need. LEDs generally use less energy than incandescent holiday lights, and they come in a wide range of colors and styles. Check product details and consider a timer to set when the display turns on and off. The U.S. Department of Energy explains the benefits of LED lighting.
Plan for a bulb or strand to need replacement during the season. Keep compatible spares nearby, or ask your installer whether repairs are part of the service. Once the lights are up, view the display after dark from the street and from indoors. A test run can reveal spots that look too bright, uneven, or difficult to see.
What Does Professional Christmas Light Installation Include?
Professional Christmas light installation can include much more than hanging lights. Depending on the provider and package, the service may cover design, product selection, installation, maintenance, takedown, and storage. Ask for a written breakdown before booking so you know which tasks the installer will handle and what you’ll need to manage yourself.
Services vary from one company to another. Some providers supply commercial-grade lights, while others install products you already own. Maintenance visits, repairs, removal, and storage may be included, offered as add-ons, or excluded. When comparing estimates, check that each quote covers the same products and seasonal services.
Share which areas you’d like to light, your preferred colors, and features you want to highlight, such as the roofline, entryway, trees, or walkway. Ask about scheduling, safety practices, and how the provider handles problems during the season. Clear answers up front help you choose a service that suits your home and expectations.
Ask about design, product selection, installation, and takedown
Find out whether the provider helps plan your display or installs lights based on a design you supply. A consultation may include recommendations for colors, patterns, and placement that suit your home’s architecture and landscaping. Share photos or walk the property with the installer to agree on the areas to light and the look you want.
Ask who supplies the lights, which products are available, and whether installation and takedown are included in the estimate. Professional installers may use commercial-grade products selected for different locations and conditions. This Christmas light installation guide recommends sharing your vision early and clarifying what the service covers. Confirm how the lights will be attached and when they’ll be removed after the season.
Confirm whether the service includes maintenance, troubleshooting, and repairs
Even a well-installed display may need attention during the season. Ask what happens if a section goes dark, a connection comes loose, or weather damages a strand. Find out whether troubleshooting visits and repairs are included, how quickly the company typically responds, and whether replacement products or labor cost extra.
Get the right contact details and reporting process before installation day, especially if lights will be placed in hard-to-reach areas. Ask how the crew plans to access those spots safely. Professional installers may use ladders, scaffolding, or lifts suited to the job, as described in this overview of Christmas light installation safety measures. Clear maintenance terms can help you avoid confusion if something needs attention.
Check product, workmanship, and service guarantees
Ask whether the lights come with a product warranty and what it covers. A product guarantee may address defects in the lights, while a workmanship guarantee may cover installation issues. These protections are different, so confirm how long each lasts and whether labor, replacement products, or service visits are included.
Request the terms in writing before you book. Check how the company handles faulty products, installation problems, or accidental damage during the work. Ask whether guarantees apply to lights you provide or only to products supplied by the installer. Commercial-grade products may suit particular settings, but materials and policies vary. Having the terms in front of you makes it easier to compare providers and understand what support you can expect.
Ask about storage, scheduling, and seasonal support
If you’d rather not pack away the display, ask whether the company offers storage. Confirm whether the service includes removal, labeling, and storage, and whether the same lights will be available for your home next season. Some providers store only the products they supply, so check whether they’ll also handle customer-owned lights.
Discuss installation and takedown dates, along with the company’s process for weather delays. Oregon’s wet winter conditions can affect outdoor work, so ask how the provider adjusts schedules and handles service calls. Find out who to contact if you need help after installation. Services that cover setup, takedown, and seasonal support can save you time, as explained in this guide to installing Christmas lights safely and efficiently.
How Much Time, Skill, and Equipment Does Each Option Require?
Estimate time for planning, shopping, installation, troubleshooting, and removal
DIY Christmas lighting takes more time than the hours spent on a ladder. You’ll need to plan the display, measure, shop, test strands, install lights, troubleshoot problems, and take everything down afterward. One estimate puts the full process at 14 to 25 hours per season for an average home, though the total depends on the size and complexity of your display. Review a sample DIY time breakdown to see how those tasks can add up.
A professional service can take much of that work off your list. Ask whether the estimate includes design, installation, maintenance, takedown, and storage. Service packages vary, so compare what’s covered as well as how much time and effort you’ll need to contribute.
Assess your comfort with ladders, basic electrical work, and outdoor tasks
Think carefully about your comfort working at height and handling outdoor electrical connections. Installation can involve climbing ladders, reaching roof edges, working in cold conditions, and connecting cords safely. If any of those tasks feel uncomfortable, simplify the display or leave elevated areas to a professional. Falls from ladders are a common holiday-season home injury, which makes it important to assess the risks before you begin. Read more about DIY and installer safety before taking on roof work.
Ground-level displays still require care. Choose outdoor-rated lights and cords, protect connections from moisture, and follow product instructions for safe use. If you’re unsure about electrical setup, ask a qualified professional for guidance rather than guessing.
Measure display areas and check roof access and complexity
Before you buy lights, decide which areas of your home you want to decorate. Measure rooflines, porch railings, trees, shrubs, and pathways to estimate how many lights and cords you’ll need. A quick sketch or a few photos can help you plan focal points and create a balanced look. This Christmas light planning guide offers ideas for choosing which features to include.
Next, consider access. A single-story home with a simple roofline may be manageable for a confident DIYer. Steep roof pitches, tall sections, tight corners, and hard-to-reach trees can make installation more complicated and time-consuming. Note these features before shopping or requesting an estimate, so you can plan for the right materials and level of support.
Consider tools, storage space, and household help
A DIY setup may call for a stable ladder, outdoor clips, extension cords, timers, and storage containers. Check what you already have, and make space to store lights somewhere dry between seasons. You may also want another person nearby to pass materials, test the display, or steady a ladder. Keep helpers on the ground for support, and don’t ask anyone to take on unsafe roof work.
Professional installers typically arrive with purpose-built equipment and products suited to outdoor use. That can save you from buying and storing as many supplies. Ask whether the service includes repairs, replacement bulbs, takedown, or storage, so you know what you’ll still need to handle.
Which Installation Option Fits Your Home and Budget?
The right choice depends on more than the cost of the lights. Consider the size and layout of your display, how comfortable you are working at height, and how much time you can set aside for planning, installation, troubleshooting, and takedown. A few strands on an easy-to-reach porch may be manageable on your own. Steep rooflines, tall trees, or multiple areas to light may call for professional help.
You can also split the work. For example, you might decorate low shrubs and railings yourself, then hire an installer for upper rooflines or hard-to-reach areas. Before deciding, compare the full season’s costs and tasks, including materials, equipment, repairs, maintenance, removal, and storage. A written plan can help clarify what you’ll handle and what you’d like a provider to take on. Use your budget, schedule, and comfort with the work to choose an approach that feels practical for your home.
Choose DIY for simple displays, limited budgets, and confident ladder users
DIY may suit a small, straightforward display, especially if you already own outdoor-rated lights and basic equipment. Decorating ground-level shrubs, porch railings, or low hedges lets you work at your own pace and make changes as you go. It can lower upfront expenses, but remember to factor in clips, extension cords, replacement bulbs, electricity, and storage.
Plan the display before you begin, test each strand, and make sure your cords and connections are suitable for outdoor use. If the project requires a ladder, take on only the areas you can reach safely, and work in appropriate conditions. A Christmas light installation planning guide can help you map out the display and prepare before you start. Keep the project within your skills and equipment.
Consider professional service for complex rooflines, tight schedules, or ongoing support
Professional installation is worth considering for steep roofs, multiple peaks, tall trees, or a display that spans several parts of your property. Installers have the tools and experience to work on challenging areas, and some service plans include design, installation, maintenance, and removal. That can save you time during a busy season and give you a contact to call if part of the display stops working.
Ask what the service includes before comparing prices. Confirm whether materials, repair visits, takedown, and storage are part of the quote, and find out how the provider handles scheduling changes or service requests. Professional help usually costs more upfront than DIY, but it may reduce the time and equipment you need to supply. This guide to stress-free Christmas light installation outlines some of the reasons homeowners choose an experienced installer.
Decide which tasks to handle and which to outsource
You don’t have to do everything yourself or hand over the whole project. Make a list of the areas you can comfortably decorate, such as low shrubs or railings, and mark the tasks you’d rather outsource, such as installing lights on a second-story roofline or a tall tree. This approach can help keep costs manageable while leaving the more challenging work to a professional.
Sketch your display and note where you’ll need special access, materials, or power. Visualizing the setup before you begin can help you identify which tasks are realistic to handle yourself. Use your plan when requesting an estimate so the provider can price the specific work you want done. A step-by-step installation guide also recommends planning the display before you climb a ladder or unpack your lights.
Ask an outdoor lighting provider about pricing, materials, maintenance, and removal
When you request an estimate, share photos of your home, rough measurements, and the areas you want to decorate. Ask how the provider calculates the price, whether lights and clips are included, and whether the quote covers installation, maintenance, repairs, takedown, and storage. If cost depends on the length of a roofline or other display area, clarify how those measurements are made. Bob Vila’s Christmas light installation cost guide explains how linear footage can help estimate project size.
Ask for the service details in writing so you can compare quotes fairly. Confirm who owns the lights, what happens if a strand fails, and whether repair visits cost extra. It’s also useful to ask about product and workmanship guarantees. One estimate may cover installation only, while another includes seasonal support and removal. Compare the full scope, not just the initial price, before choosing a provider.
How Can You Compare Options Before Deciding?
List materials, labor, equipment, and seasonal services
Start by listing everything you’ll need for a DIY display: lights, clips, extension cords, timers, replacement bulbs, tools, electricity, and storage. Add the time you expect to spend shopping, installing, troubleshooting, and taking the lights down.
For a professional estimate, check whether the price includes lights, labor, access equipment, maintenance, removal, and storage. Some providers supply commercial-grade lights, while others install lights you already own. A guide to DIY and professional Christmas light costs can help you identify expenses that are easy to miss. Compare the full season of materials and services, not just the initial installation price.
Gather measurements, photos, and design preferences before requesting an estimate
Before asking for estimates, measure the areas you want to decorate and take clear photos of your home from the street and yard. Point out features that could affect the work, such as tall peaks, steep roof sections, large trees, or outlets far from the display area. You don’t need a finished design, but a little preparation helps providers understand the project.
Think about the look you want, too. Note whether you prefer warm or cool white lights, colorful strands, or accents on trees, pathways, and architectural details. This Christmas light planning guide offers ideas for choosing areas beyond the roofline. Share the same photos and preferences with each provider so you can compare estimates for similar work.
Compare written quotes by service scope and safety practices, not price alone
Ask for a written estimate that outlines the work, materials, and services included. Check whether the provider supplies and installs the lights, handles repairs during the season, and removes the display afterward. Ask whether storage is included and whether the quote covers every area you discussed. A lower price may cover fewer lights or fewer services, so compare estimates with the same project scope.
Ask how the crew will access high or difficult areas, secure cords, and protect your property. Also find out who to contact if a strand fails or a light comes loose. Bob Vila’s Christmas light installation cost guide explains that light purchases and post-holiday removal may not be part of every quote. Confirm these details in writing before you choose.
Review DIY safety guidance and the provider’s installation and maintenance policies
If you’re planning a DIY display, inspect every strand and cord for damage before installation. Use lights, cords, and fixtures rated for outdoor use, keep connections away from water, and follow the manufacturer’s limits for connecting light strings. Use a GFCI-protected outlet, and avoid ladder work in wet or windy conditions. HomeAlliance’s Christmas light safety tips offer a useful checklist for preparing your setup.
If you hire a provider, ask about installation methods, maintenance visits, repair response times, and service guarantees. Clarify what happens if part of the display stops working and whether repairs cost extra. For Oregon homes, it’s especially helpful to ask how the provider handles service during wet weather. Clear answers help you understand the support included throughout the season.
Frequently Asked Questions
Is DIY Christmas light installation right for every home?
DIY can work well for small displays on ground-level areas or easy-to-reach railings. If your plan includes steep roof sections, tall trees, or spots you can’t access safely, consider hiring an experienced installer.
What costs should I include when comparing DIY and professional installation?
For DIY, count lights, clips, cords, tools, electricity, replacement products, storage, and your time. For a professional estimate, check whether it covers materials, installation, repairs, takedown, and storage.
What should I ask a Christmas light installer before booking?
Ask what the quote includes, which lights and attachment methods the provider uses, and how they handle repairs during the season. Confirm scheduling, takedown, storage, and any product or workmanship guarantees in writing.
How can I reduce safety risks if I install lights myself?
Use outdoor-rated lights and cords, inspect them for damage, and plug them into a GFCI-protected outlet. Set ladders on firm, level ground, avoid working in wet or windy conditions, and don’t climb onto a roof if access feels unsafe.
Can I combine DIY and professional installation?
Yes. You can decorate areas you can reach comfortably, such as low shrubs or porch railings, and hire a professional for rooflines, tall trees, or other challenging locations. Share your plan when requesting an estimate so the provider can price the work you want done.