
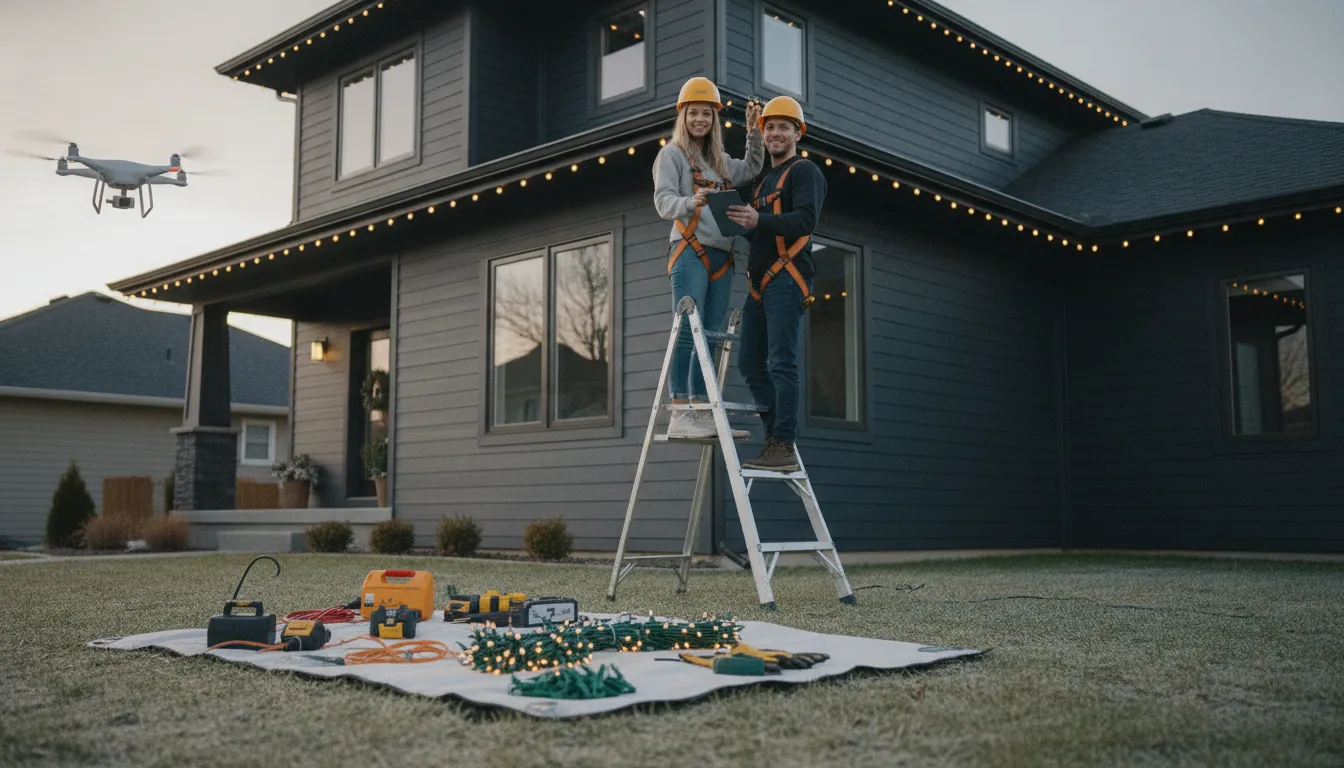
A roofline covered in lights can look simple from the sidewalk. Hanging them safely is another matter, especially when ladders, wet weather, and electrical connections are involved. Before you start your Christmas light installation, take time to inspect your lights, plan cord routes, and check where you can work from stable ground. Oregon’s changing winter weather makes choosing a dry, calm day especially important. This guide covers practical steps for planning a display, selecting outdoor-rated supplies, and keeping cords clear of paths and standing water. You’ll also learn when a job may be better suited to an outdoor lighting professional.
Key Takeaways
- Plan your display before buying supplies: Measure rooflines, trees, paths, and other features, then map outlets and cord routes to choose suitable lights and accessories.
- Make safety part of the setup: Use outdoor-rated equipment and GFCI-protected outlets, follow strand connection limits, and install only in dry, calm weather.
- Choose DIY or professional help based on the job: Consider access, roof height, time, and service costs, then inspect and store lights carefully to prepare for next season.
Plan Your Christmas Light Installation
A well-planned display is easier to install, safer to operate, and less likely to need last-minute fixes. Before you buy lights or set up a ladder, decide which parts of your home or property to highlight, measure those areas, and work out how you’ll power the display. Oregon’s changing weather is worth factoring in, too. A few notes on paper can help you shop for the right supplies and choose a suitable day to install.
Set a budget, choose display areas, and check local rules
Set a budget that includes more than lights. Account for clips, outdoor-rated extension cords, timers, replacement bulbs, and any tools you still need. If you’re considering professional installation, ask what the quoted service covers. Some packages include design, installation, repairs, storage, and removal, as outlined in this Christmas light installation guide.
Then choose a few areas to feature, such as the roofline, entryway, porch, or a tree beside the driveway. Starting with clear focal points can help you create a cohesive display without lighting every corner of your property. Check HOA guidelines or lease requirements before decorating. For a business, confirm plans with the property owner or manager, and check whether local rules apply to signs, walkways, or shared spaces.
Measure rooflines, windows, paths, trees, and other features
Measure each area before shopping, and write down the results by location. Record roofline lengths, window dimensions, walkway distances, and the approximate size of trees or shrubs. Measure roof sections separately, including corners and changes in height, so you can choose strands that fit each section.
For trees, decide how much of the trunk and branches you want to cover, then estimate the strand length needed. For paths, consider where lights will sit and how they’ll connect to power without crossing a walkway. Leave some extra length for turns and connection points, but follow the product’s instructions for linking strands. Planning focal points before installation is also useful for larger properties, as explained in this commercial outdoor Christmas design guide.
Map outlets, cord routes, and power needs before you shop
Locate the outdoor outlets you plan to use, then sketch a route from each outlet to the display area. Mark where extension cords will be needed, and make sure each is rated for outdoor use. Keep cords away from doorways and walking routes, and avoid areas where water collects. A timer or outdoor-rated smart plug can help set a consistent schedule for your lights.
Check the power requirements and connection limits printed on each light set. Don’t connect more strands than the manufacturer allows, or overload an outlet or circuit. If your plan calls for several displays, spread the electrical load across suitable outlets instead of connecting every strand in one chain. The installation guide also recommends distributing strands across outlets. If you’re uncertain about your home’s capacity, simplify the design or consult a qualified electrician before installation.
Plan for Oregon rain, wind, and changing weather
Choose a dry, calm day for installation, and check the forecast before you start. Rain can make roofs and ladders slippery, while wind can make it harder to keep your balance or secure a strand. Postpone the work if conditions change, and never handle plugs or electrical connections with wet hands.
Use lights, cords, clips, and timers labeled for outdoor use, and inspect them for damage before hanging them. Plan where connections will sit so they stay off the ground and away from standing water. Secure strands against gusts, but use clips that won’t damage shingles, siding, or tree branches. If the display involves a steep roof, a high installation point, or conditions you’re not comfortable handling, consider asking an outdoor lighting professional for help.
Choose Christmas Lights, Tools, and Materials
The right supplies help your display look cohesive and make installation easier. Before you shop, consider where each light will go, how you’ll power it, and whether it’s rated for outdoor use. Oregon’s winter rain and wind make it especially important to check product labels and secure each strand as directed.
Compare LED, incandescent, and solar lights
LED lights use less energy than incandescent strands and typically last longer, making them a practical choice for displays that stay on for several hours each evening. Incandescent lights give off a familiar warm glow, but they use more electricity and may burn out sooner. Solar lights can illuminate areas far from an outlet without adding to your electricity use. They need sunlight to charge, however, so cloudy winter days may affect how long they shine after dark. Think about the location, brightness, and power source you need, then follow the product instructions. This guide to Christmas light types explains the differences between common options.
Match string, icicle, net, and pathway lights to each area
Choose light styles to suit the features you want to highlight. String lights work well along rooflines, railings, and architectural details. Icicle lights hang from eaves, while net lights can cover shrubs more evenly than individual strands. Pathway lights help define walkways and driveways so guests can see where they’re going. Measure the areas before you buy, and check each product’s recommended use and coverage. This helps you estimate how many strands you need and avoid awkward gaps. A Christmas light design guide shares examples of how different styles can work across a home’s exterior.
Choose bulb sizes, colors, and effects for your home
Bulb size and color shape how your display looks from the street. Larger bulbs can draw attention to rooflines and focal points, while smaller lights work well on trees, shrubs, and detailed accents. Warm white creates a classic look; multicolored strands add a playful feel. You can combine colors, but stick to a consistent palette so the overall display feels intentional. Consider your home’s exterior color and existing decorations as you choose. If you like twinkling or color-changing effects, use them in one area as an accent. Keeping effects focused can help the display feel coordinated rather than busy.
Gather outdoor-rated cords, clips, a ladder, and a timer or smart plug
Make a supply list before installation. Choose extension cords labeled for outdoor use; many have a “W” marking on the jacket. Use light clips designed for the surface you’re attaching them to, rather than nails or staples, which can damage wire insulation. Select a stable ladder that reaches the area, and ask someone to stay nearby while you work. A timer or outdoor-rated smart plug can turn the display on and off automatically. Check labels to confirm that cords, plugs, clips, and controls are suitable for exterior conditions. These installation tips cover helpful equipment and setup considerations.
Check light ratings, strand condition, and connection limits
Before hanging lights, confirm that each strand is rated for outdoor use and follow the manufacturer’s instructions. Inspect bulbs, plugs, and wires for cracks, fraying, or loose connections. Set damaged strands aside instead of using them. Check the label for the maximum number of strands that can connect end to end, since limits vary by product. Avoid overloading outlets or circuits, and distribute lights across available outlets when appropriate. Use GFCI-protected outlets for outdoor connections, and keep plugs and connections protected as directed by the product instructions. If you’re unsure whether your setup can handle the display, ask a qualified electrician before plugging it in.
How Do You Balance a Light Display?
A balanced Christmas light display doesn’t need to cover every surface. Choose a few features to highlight, then use consistent colors and spacing to bring the look together. Before installing lights, think about how the display will appear from the street, driveway, and entry. A quick plan helps you spot areas that might feel crowded or unfinished, whether you’re decorating a home or a storefront.
Choose focal points and use symmetry for balance
Start with one or two focal points, such as a roofline, front door, large tree, or distinctive architectural feature. Build the rest of the display around them. For example, outline the roof and frame the entry, then add smaller accents to nearby shrubs or a pathway. Symmetry can make a display feel calm and polished, but the two sides don’t have to match exactly. If a large tree draws attention on one side, balance it with lights on the other side of the property. This commercial Christmas light design guide recommends choosing focal points before installation, an approach that works for residential and commercial displays alike.
Check the display from the street, driveway, and entry
Step back and view your layout from a few different spots before calling it finished. From the street, check the overall shape and brightness. From the driveway, see whether the lights frame the approach. From the entry, make sure the doorway feels welcoming and steps remain visible. A display can look even up close but seem crowded or lopsided from farther away. Ask someone else to take a look, too: a fresh perspective can help you notice gaps or areas that draw too much attention. Make small adjustments as you go, rather than adding more lights everywhere. The goal is a display that feels connected from each viewpoint.
Coordinate colors, lighting styles, and holiday decorations
Choose a color palette before you shop. Warm white lights pair naturally with greenery and traditional decorations, while multicolored strands create a livelier look. If you mix colors, repeat them in more than one area to tie the display together. Match the light style to the feature: string lights work well along rooflines and railings, while net lights can cover shrubs more evenly. Try to limit the number of bulb shapes and flashing effects so each area supports the overall design. These Christmas light design ideas offer inspiration, but choose details that suit your property instead of trying to recreate an entire display.
Measure strand lengths and plan spacing before installation
Measure the rooflines, windows, railings, paths, and trees you plan to decorate, then note each measurement. Check the length and bulb spacing listed on each light set so you can estimate how many you’ll need. Plan where each strand starts and ends, and identify the nearest outdoor outlet before you begin. This can help prevent short gaps, excess lights, or last-minute changes to your layout. Keep bulbs evenly spaced for a neat finish, and use clips designed for the surface you’re decorating. HGTV’s outdoor holiday lighting ideas show how outlining rooflines and window casings can draw attention to a home’s architecture.
How Can You Install Christmas Lights Safely?
A safe display starts before you hang the first strand. Check the weather, inspect your lights and cords, and plan where the ladder and power connections will go. Oregon rain and wind can change conditions quickly, so pause the job if the setup no longer feels safe.
Work in dry, calm weather and stay clear of power lines
Choose a dry, calm day for outdoor installation. Rain, snow, and wind can make ladder work more difficult and increase electrical risks. If the weather turns, stop and wait for conditions to improve.
Before setting up, look for overhead power lines near your roof, trees, and planned light locations. Keep yourself, your ladder, and the lights well away from them. Never hang lights on a power line or work where your ladder could reach one. If power lines are close to the area you want to decorate, contact your utility provider or a qualified professional before proceeding.
The Christmas light installation guide from eufy also recommends avoiding outdoor electrical work in wet or windy weather.
Set up a stable ladder and keep three points of contact
Place your ladder on firm, level ground, and make sure its feet are secure before climbing. Keep it away from doorways and busy walkways where someone could bump into it. Follow the ladder’s instructions, and ask another adult to steady it when appropriate.
As you climb and work, maintain three points of contact: two hands and one foot, or two feet and one hand. Don’t lean far to either side. Climb down and reposition the ladder instead of reaching beyond a comfortable distance. Keep tools and light strands close at hand, and avoid carrying bulky items while climbing. If the job requires you to stretch across a roofline or work at an uncomfortable height, leave it to a professional.
Use purpose-made clips, not nails or staples
Choose clips designed for the surface you’re decorating, such as gutters, shingles, or siding. Check the packaging to make sure the clips suit both the installation spot and the type of lights you’re using. Even spacing helps hold the strand in place and gives the display a clean, consistent look.
Avoid nails, staples, and other fasteners that pierce or crush the wire. They can damage insulation and expose wiring to moisture. Before hanging a strand, check for cuts, cracks, loose connections, or other signs of wear. Set damaged lights aside rather than using them. The eufy installation guide recommends clips as a safer option for securing lights without damaging the wire insulation.
Use outdoor-rated equipment and GFCI-protected outlets
Check the labels on your lights, extension cords, timers, and smart plugs before using them outdoors. Indoor products may not be designed to withstand exposure to rain and other weather. Outdoor extension cords often have a “W” marking on the jacket, but read the label and follow the manufacturer’s instructions.
Plug outdoor lights into a ground-fault circuit interrupter, or GFCI-protected, outlet. A GFCI helps reduce the risk of electric shock if an electrical fault occurs. If you’re unsure whether an outlet has GFCI protection, look for test and reset buttons or ask a qualified electrician. Use only outdoor-rated accessories, and don’t use equipment with damaged plugs, cracked housings, or exposed wires.
Keep connections elevated and cords clear of paths and standing water
Plan your cord routes before plugging in the display. Keep cords out of walkways, driveways, and doorways where people could trip over them or vehicles could run across them. If a cord must cross a path, use a cord cover rated for that location, or choose another route.
Keep plugs and connections off the ground and away from puddles, wet soil, and spots where water collects. Use outdoor-rated covers as directed by the manufacturer, and check the display after heavy rain or wind. Unplug the lights before adjusting wet equipment. If a cord is damaged or a connection gets wet, turn off the power before handling it. Replace damaged equipment rather than continuing to use it.
Avoid overloaded circuits and follow product instructions
Read the instructions for each light strand to find out how many strands can connect together and what power source to use. Limits vary, so don’t assume that strands are safe to join just because their plugs fit. Keep track of which lights are connected to each outlet, and distribute the load across circuits when the product instructions allow.
Avoid plugging several high-use decorations into one outlet or extension cord. If a breaker trips, a plug feels hot, or you notice a burning smell, turn off the power and address the issue before using the display again. Never bypass a breaker or replace it with one rated for more current. When you’re unsure about your home’s electrical capacity, ask a qualified electrician. The eufy safety guide also advises following strand limits and avoiding overloaded circuits.
What Affects Christmas Light Installation Costs?
Christmas light installation costs depend on the size of your display, the materials you choose, and how much work it takes to reach and decorate each area. A simple roofline may need fewer supplies and less time than a display with trees, windows, pathways, and several roof peaks.
Before you shop or request an estimate, sketch your plans and list the areas you want to light. This makes it easier to compare costs and spot expenses beyond the strands themselves, such as clips, cords, timers, and replacement bulbs. If a roof is steep or difficult to access, include that in your plan and consider whether professional help is the right choice.
Consider light type, display size, roof access, and design complexity
The more areas you decorate, the more lights and installation time you’ll likely need. Measure rooflines, windows, trees, and pathways separately so you can estimate each part of the display. Light type also affects cost: specialty bulbs, custom-cut strands, and coordinated color schemes may cost more than standard string lights.
Roof height, steepness, and access can add to the work. Complex rooflines or detailed spacing may take longer to install than a straightforward outline. As a general reference, this Christmas light installation guide cites professional installation costs of about $3 to $7 per linear foot. Treat that as a broad estimate, not a local quote. Ask what an estimate includes, such as lights, installation, maintenance, and removal.
Budget for tools, clips, cords, timers, and replacement lights
For a DIY display, include more than the price of the lights in your budget. You may need outdoor-rated extension cords, purpose-made clips, a stable ladder, and a timer or smart plug. Set aside money for replacement bulbs or strands, too, in case a section stops working during the season.
Check your existing supplies before you buy, and confirm that cords and accessories are rated for outdoor use. Use light clips instead of nails or staples, which can damage wire insulation. A timer can automate when the display turns on and off, so include it if you want to avoid switching the lights manually. Listing each item before shopping helps you keep track of the full project cost.
Compare LED and incandescent energy use
LED lights generally use less electricity than incandescent lights, which can make them a good option for a large display or one that stays on for several hours each evening. Incandescent lights offer a familiar warm glow, but they typically use more energy and can become hot while operating. Consider both the appearance and the expected running cost when choosing.
The purchase price is only one part of the decision. Check product details for energy use, expected lifespan, and warranty. Commercial-grade LED strands can last for many seasons when used and stored as directed, while some lower-cost products may need replacing sooner. The installation guide’s comparison of light types notes that commercial-grade LEDs may be rated for 20,000 to 50,000 hours. Actual lifespan varies by product and use.
Reduce waste by measuring, testing strands, and planning power routes
Measure each area before buying lights, then write down the lengths beside a simple sketch of your home. This helps you choose suitable strand lengths and avoid purchasing more than you need. Mark where outlets are located and plan cord routes in advance, including how you’ll keep cords out of walkways and away from areas where water may collect.
Test each strand before installation, and check that colors and effects look consistent together. Follow the manufacturer’s instructions for connections, and do not exceed the stated limits for connected strands. Planning power routes can also help you identify whether you have enough outdoor outlets or need a different display plan. A few minutes of measuring and testing can prevent extra shopping trips and make installation more straightforward.
Should You Install Christmas Lights Yourself or Hire a Professional?
The best choice depends on the size of your display, your comfort with ladder work, and the time you can set aside. A few lights around a porch may be manageable as a DIY project. Steep rooflines, tall trees, and difficult access can make professional installation a safer, simpler option.
Weigh DIY costs, time, effort, and creative control
Installing lights yourself can cost less, particularly if you already have a stable ladder, outdoor-rated extension cords, and clips. You’ll also have direct control over the colors, layout, and pace of the project. Remember to budget time for measuring, testing strands, hanging lights, and taking everything down after the season. The work can be physically demanding, and using a ladder carries risks. Eufy’s Christmas light installation guide covers common DIY costs and safety considerations. If you enjoy hands-on projects and can keep the display within safe reach, doing it yourself may be a good fit. If you have limited time or prefer to avoid ladder work, request a professional estimate.
Consider roof height, complex rooflines, and safe power access
Check your home’s access points before deciding. A single-story house with reachable eaves is very different from a multi-story home with steep pitches, dormers, or high peaks. Consider whether you can place a ladder on firm, level ground and reach the area without leaning. Also plan how cords will reach outdoor outlets without crossing walkways or sitting in water. Oregon’s rain and wind can make outdoor work unsafe, so wait for calm, dry conditions. Keep well away from overhead power lines. If you’re unsure whether you can reach an area safely or connect the lights properly, hire someone with the right equipment and experience. The Occupational Safety and Health Administration’s ladder guidance offers practical reminders for safe ladder use.
Compare professional design, installation, maintenance, and removal
A holiday-lighting service may cover more than installation. Depending on the provider, a package can include design, lights, installation, repairs during the season, removal, and storage. Ask whether the company supplies the lights or can install strands you already own. Find out who to contact if a section goes dark or a clip comes loose, and whether service calls are included in the quoted price. A professional can help plan lighting for rooflines, trees, paths, and entry areas, while you choose how much of the project you want to handle. Compare the complete service, not only the installation fee, so you know what support to expect throughout the season.
Ask about service scope, pricing, and seasonal or permanent options
Request an itemized quote and confirm whether it includes design, materials, installation, repairs, removal, and storage. Costs vary with the display’s size, light type, roof access, and design complexity. As a general reference, Eufy’s guide cites an estimate of $2.50 to $7 per linear foot, or roughly $400 to $1,200 for a typical two-story home. Treat those figures as a starting point, not a local quote. Ask Oregon providers how they price your specific home and what happens if weather delays installation. You can also ask whether they offer seasonal holiday displays, permanent outdoor lighting, or both, so you can compare options based on how you plan to use the lights.
Hire a professional if the work feels unsafe or exceeds your experience
Listen to your instincts if a roofline feels too high, a ladder won’t sit securely, or you’re uncertain about the electrical setup. For ladder work, keep three points of contact and avoid reaching sideways; climb down and reposition the ladder instead. Don’t install lights in rain, wind, or on wet surfaces. The National Fire Protection Association’s holiday decorating guidance also recommends taking care with seasonal decorations and electrical equipment. Consider a professional for steep roofs, tall trees, awkward access, or work near power lines. A lighting provider can assess the setup and handle areas that fall outside your experience, leaving you with a display you can enjoy without taking unnecessary risks.
How Do You Maintain and Store Christmas Lights?
Regular checks help keep your Christmas light display working through Oregon’s wet, windy season and make next year’s setup simpler. Turn off and unplug the lights before adjusting strands, plugs, or clips.
Check strands, connections, and timers during the season
Set a weekly reminder to check that every section of your display is lit and that plugs, cords, and clips remain secure. After heavy rain or wind, look for strands that have shifted and cords that have moved into walkways. Test timers or smart plugs, too, so the display switches on and off when you expect.
If you find a frayed cord, exposed wire, or water inside a connection, turn off and unplug the display. Don’t use equipment that appears damaged or unusually warm. Follow the manufacturer’s instructions, and replace questionable items before switching the lights back on. Eufy’s Christmas light installation guide also recommends checking strands, connections, and timers throughout the season.
Replace damaged lights and secure loose clips promptly
Replace strands with cracked sockets, broken plugs, or exposed wires. Don’t cover cord damage with tape or keep using a strand that flickers when its connection moves. Check the product instructions when replacing bulbs, and stay within the stated limit for how many strands you can connect together.
Wind can loosen clips along rooflines, gutters, and fences. Turn off and unplug the lights before securing them, then use clips made for the light type and surface. Avoid nails and staples, which can pierce wire insulation. If a loose strand is out of safe reach, don’t stretch from a ladder or climb onto a wet roof to fix it. Wait for suitable conditions, use proper equipment, or contact a lighting professional.
Remove lights carefully and inspect them before storage
Unplug the lights before taking them down, and choose a dry, calm day for the work. Use a stable ladder for elevated areas, and remove clips gently instead of pulling on the wires. As you take down each strand, keep it separate from the others so you can inspect it without sorting through a tangled bundle.
Check strands, plugs, extension cords, and clips for fraying, corrosion, broken parts, or signs of moisture. Set damaged items aside for proper disposal rather than packing them away for another season. Let lights dry completely before storing them. This inspection gives you time to replace worn equipment before your next installation, instead of discovering a problem while decorating.
Label and store strands, cords, and accessories for next season
Wrap each strand loosely around a reel or piece of cardboard to help prevent tangles. Avoid tight bends, which can strain wires or damage bulbs. Store lights, extension cords, timers, and clips in a cool, dry place, and keep small accessories together in a separate container or bag.
Label each strand with where you used it, such as “front roofline” or “walkway shrubs.” Add useful details, including the strand’s length, color, or any bulbs that need replacing. Grouping supplies by display area makes next season’s setup easier to plan. Keep product instructions and compatible replacement bulbs with the lights, and choose a storage spot protected from moisture, pests, and heavy items that could crush the strands.
Frequently Asked Questions
When should I install Christmas lights in Oregon?
Choose a dry, calm day when your roof, ladder, and ground are not wet. Check the forecast before you start, and postpone the work if rain or wind makes conditions unsafe.
Can I use indoor Christmas lights outside?
No. Use lights, extension cords, timers, and smart plugs labeled for outdoor use. Check each product’s instructions, and connect outdoor lights to a GFCI-protected outlet.
How many strands of Christmas lights can I connect together?
There isn’t one limit for every product. Check the label or manual for each strand and stay within its connection limit. If your display needs several outlets or you’re unsure about your home’s electrical capacity, consult a qualified electrician.
When should I hire a professional to install Christmas lights?
Consider professional help for steep or tall rooflines, high trees, difficult access, or work near power lines. A lighting provider can also explain whether design, repairs, removal, and storage are included in the estimate.
How should I store Christmas lights after the holidays?
Unplug and inspect each strand as you take it down. Let the lights dry fully, wrap them loosely to prevent tangles, and store them in a cool, dry place. Labeling strands by where you used them can make next season’s setup easier.