
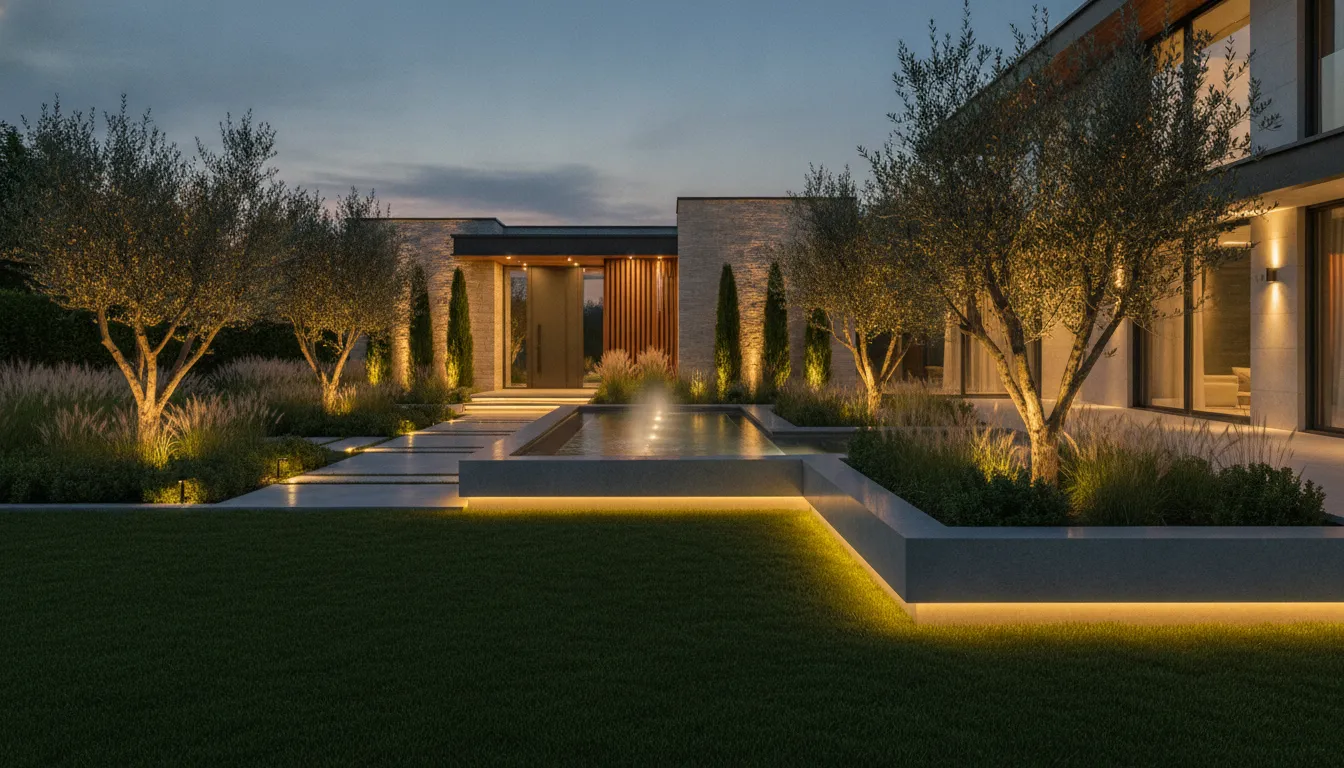
A well-planned lighting system starts with your property and how you use it, not with a shopping cart full of fixtures. Understanding landscape lighting installation cost can help you decide which areas to prioritize and what to include in your budget. A few path lights may suit a simple entrance, while a larger Oregon property could need a mix of walkway, accent, deck, or patio lighting. The estimate may also include wiring, a transformer, controls, labor, and site preparation. In this guide, you’ll learn what affects the price, how to compare estimates, and which questions can help you make a confident choice.
Key Takeaways
- Use cost estimates as a guide: Professional landscape lighting often costs $2,000 to $6,000, but the final price depends on your property and project scope.
- Prioritize practical lighting goals: Focus on entrances, paths, patios, and key features, then choose fixtures and controls suited to the layout and Oregon weather.
- Compare itemized proposals: Check that estimates include equipment, labor, wiring, permits when required, testing, and warranty details before choosing an installer.
What Does Landscape Lighting Installation Cost?
Landscape lighting installation costs depend on the property, the fixtures you choose, and the work required to install them. National averages offer a useful starting point, but an on-site assessment is the best way to get a quote that reflects your yard or commercial property. Ask for an itemized estimate so you can see what the project includes and compare proposals accurately.
Typical professional project: $2,000–$6,000
A professionally installed low-voltage LED landscape lighting system commonly costs between $2,000 and $6,000. A smaller project with a simple layout may cost less, while a larger or more detailed design may cost more. Fixture count matters, but it is not the only factor. Wiring distance, transformer capacity, site access, and installation complexity can all affect the price. Use the range as a planning guide rather than a guaranteed quote. A landscape lighting cost breakdown provides more detail on how project scope can influence the total.
Average standard-yard project: about $3,250
A standard-yard project may cost around $3,250, although published estimates vary. Some place the average closer to $3,500, with many projects ranging from $2,000 to $6,000. These are national figures, so your final price will depend on the property and local labor rates. A few lights along a front walkway require a different plan than a larger yard with trees, garden beds, paths, and a patio. When comparing estimates, check that each covers a similar number of fixtures and the same installation work. This standard-yard cost guide offers another reference point.
What estimates cover: fixtures, wiring, transformer, design, and labor
A landscape lighting estimate may include design, fixtures, low-voltage wiring, a transformer, installation, and labor. The transformer powers the system, and wiring connects it to each light. Ask whether the proposal also covers fixture aiming, system testing, cleanup, and controls such as timers or dimmers. The fixture models and materials matter, too, since they can affect both the upfront price and long-term performance outdoors. Request an itemized estimate that lists what is included and identifies any optional work. This makes it easier to compare contractors and avoid surprises. A low-voltage lighting cost breakdown can help you understand common estimate components.
Common added costs: electrical work, permits, repairs, and difficult access
Electrical work, permits, existing wiring repairs, and difficult site access can add to the project cost. Permit rules depend on your location and the type of system. Some jurisdictions may waive permits for low-voltage installations, while others may require a permit or sign-off from a licensed electrician. Installation can also take more time if crews need to work around established landscaping, steep areas, or hardscaping. Ask your installer to flag potential extra costs before work begins, and confirm who will arrange permits or inspections. Checking local requirements early can help you plan the budget and schedule with fewer surprises.
How residential and commercial budgets differ
Homeowners often prioritize entrances, paths, patios, and landscape features. Commercial properties may need lighting across larger areas, including walkways, signs, parking areas, and outdoor gathering spaces. Those projects can involve different coverage needs, controls, and installation logistics. There is no single price for commercial landscape lighting: a small storefront and a large property require different designs and budgets. Ask for a site-specific proposal that considers how the space is used, when lights need to operate, and what maintenance it may require. The landscape lighting market overview describes the range of uses for outdoor lighting at homes and businesses.
What Affects Landscape Lighting Installation Costs?
Landscape lighting estimates reflect the work needed to design and install a system that suits your property. The number of fixtures matters, but so do the layout, materials, wiring routes, and electrical requirements. Oregon’s wet conditions also make fixture ratings and installation details worth considering from the start.
Property size, layout, lighting zones, and fixture count
A larger property often needs more fixtures and longer wire runs, but square footage alone doesn’t determine the price. A smaller yard with steps, garden beds, mature trees, and a patio may call for more planning than a wide, open lawn.
Think about how you want to use each area. Path lights can guide people to an entrance, while spotlights can draw attention to trees or architectural details. These different purposes create lighting zones, each with its own fixture and placement needs.
A thoughtful design focuses on priority areas rather than adding lights everywhere. An installer can assess your layout and suggest a fixture count that provides useful coverage without creating glare. This landscape lighting cost overview also explains how property size and fixture quantity can affect a project estimate.
Fixture quality, materials, and placement
Fixture material and construction affect both upfront cost and long-term performance. Plastic and aluminum fixtures tend to be more affordable, while brass and copper options generally cost more and may offer greater durability. The best fit depends on the fixture’s location, exposure to weather, and the look you want.
Placement matters just as much as quality. A fixture can be well made and still create poor results if it shines into a window, causes glare on a path, or misses the feature it should highlight. Choose a fixture suited to its task, then aim it carefully.
An installer can help match beam direction and brightness to each location. This guide to common lighting design mistakes explains why fixture choice and placement work best as part of the same plan.
Labor rates, site access, terrain, and installation complexity
Labor costs depend on the time and skill required to plan, install, and test the system. Crews may work more efficiently in accessible planting beds than on a steep slope, around dense tree roots, or within established landscaping that needs protection. Local labor rates also influence the estimate.
Site access can add time to a project. Narrow passages, uneven ground, mature trees, and areas far from a power source may require extra planning or careful installation methods. These conditions don’t always mean a major price increase, but they should be included in a site-specific quote.
Ask the installer to explain how your property affects labor and what steps they’ll take to protect existing plants and hardscaping. A discussion of terrain and site access can help you prepare useful questions for an assessment.
Trenching, hardscaping, wire runs, and transformer capacity
The length and route of the wiring affect both materials and labor. Cable may run through lawns or planting beds, where the installer may need to dig a narrow trench and restore the area afterward. Routes beside patios, retaining walls, or driveways can take extra care to avoid damaging finished surfaces.
The transformer also needs to support the system’s electrical load. It converts household power to the low voltage used by many landscape fixtures. Choosing an appropriate capacity can help the system run reliably and leave room for planned additions. Ask your installer to explain the expected load and whether the transformer can support future fixtures.
Discuss wire routes, trenching, and hardscape crossings before work begins. This cost breakdown for wiring and trenching offers general pricing context, though the actual cost depends on the property and installation plan.
Controls, electrical work, permits, and inspections
Timers, dimmers, photocells, and smart controls can add to the initial estimate. They can also make the system easier to manage, from setting operating hours to adjusting brightness. A timer may be enough for a simple residential path-lighting system, while a commercial property may need controls that support consistent hours across several areas.
Electrical work beyond the low-voltage installation can affect the budget, too. Depending on the project and local requirements, you may need a licensed electrician, a permit, or an inspection. Requirements vary by municipality, so check with your local building department before finalizing the plan.
Ask the installer which controls, electrical services, permits, and inspections are included in the quote. This permit and inspection guidance can help you identify details to confirm before work starts.
Oregon weather, moisture, and outdoor-rated equipment
Rain, damp soil, and seasonal weather make equipment selection important for Oregon properties. Choose fixtures designed for outdoor use, and check that exposed locations have an appropriate weather-resistance rating. Durable finishes and protected connections can also help fixtures and wiring withstand regular moisture exposure.
Conditions vary across a property. A light under a covered patio faces different exposure from one beside a path or in an open garden bed. Match each fixture to its location, intended brightness, and beam spread, rather than choosing every light based on appearance alone.
Ask your installer how the proposed equipment suits your site and where each fixture will sit. This outdoor lighting selection guide recommends considering weather exposure alongside a fixture’s intended use.
How Much Do Landscape Lighting Fixtures Cost?
Landscape lighting fixture prices depend on the type of light, its materials, brightness, and outdoor durability. As a starting point, path lights often cost $30 to $100 each, while spotlights, floodlights, and deck lights fall into different ranges. These figures cover the fixtures themselves. Design, wiring, transformers, controls, and installation may add to your project’s total.
Before choosing fixtures, decide what you want each area of your property to do. Path lights help people see where they’re walking, while spotlights bring attention to trees or architectural details. Floodlights cover wider areas, and deck or step lights make changes in elevation easier to see. Matching a fixture to its purpose can help you plan a useful layout and avoid buying more lights than you need.
The number of fixtures also depends on your property’s size and layout. A straight path may need a different arrangement from a winding garden walkway, and a mature tree may need more than one light to show its shape. In Oregon, outdoor fixtures also need to withstand rain and seasonal weather. When comparing estimates, ask whether each price covers the fixture only or includes installation and related equipment.
Path lights: $30–$100 each
Path lights typically cost $30 to $100 each. They illuminate walkways, garden paths, and driveways, helping people see their route after dark. Price can vary based on the fixture’s materials, finish, light output, and features such as a shield that directs light downward and reduces glare.
The right number depends on the path’s length, shape, and surroundings. Spacing lights evenly can make a walkway easier to follow, but curves, steps, and darker areas may need extra attention. Some guidance suggests spacing path lights about 20 to 30 feet apart, though that distance is not a rule for every property. Best Pro Lighting shares advice on path-light spacing and placement. A carefully planned layout can create an even glow without crowding the path with fixtures.
Spotlights: $50–$150 each
Spotlights generally cost $50 to $150 each. Their focused beams can highlight trees, stonework, garden features, or parts of a home’s exterior. Adjustable fixtures are useful when plants grow or you change your landscape, since you can re-aim the beam rather than replace the light.
The beam angle and brightness affect how a spotlight looks once installed. A narrow beam can accent a tree trunk, while a wider beam may work better for a broad feature. Durable materials and outdoor-rated construction can also affect the price, especially in areas exposed to rain. Plan the aiming carefully: a spotlight should draw attention to its target without shining into windows or creating glare for people nearby. For a balanced effect, consider how the spotlight will work alongside path lights and other fixtures in the same area.
Floodlights: $75–$200 each
Floodlights usually cost $75 to $200 each. Their wide beams can cover driveways, yards, building exteriors, and other larger areas. Because one floodlight may illuminate more ground than a spotlight, the number required depends on the coverage area, mounting height, beam spread, and desired brightness.
Check a fixture’s light output and beam angle before you buy. A powerful light aimed poorly can create harsh glare, while a less powerful fixture may leave a large area dim. Placement matters on commercial properties, too, where lighting may need to cover entrances or parking areas without spilling onto neighboring sites. Brookside Landscape and Design outlines typical costs for low-voltage landscape lighting fixtures. A lighting plan can help determine whether one floodlight will do the job or whether several fixtures will provide more even coverage.
Deck and step lights: $50–$120 each
Deck and step lights typically cost $50 to $120 each. Install them on stair risers, deck posts, railings, or nearby walls to make steps and changes in elevation easier to see. They can also add a comfortable layer of light to patios and seating areas without relying on bright overhead fixtures.
Choose lights rated for outdoor use and suited to their installation location. Fixtures close to the ground or built into steps may be exposed to moisture, dirt, and regular foot traffic, so sturdy construction is worth considering. The fixture count depends on the width and layout of the stairs, as well as how evenly you want to light each step. Place lights to make edges visible while keeping the light comfortable for people walking or sitting nearby. A lighting professional can help coordinate step lights with deck and landscape fixtures for a consistent look.
How brightness, beam spread, and placement affect costs and fixture counts
Brightness, beam spread, and placement all influence your fixture choices and the number of lights in your plan. A narrow beam may highlight a small feature with one well-aimed spotlight, while a wider beam can cover a larger area. On a path, spacing fixtures at regular intervals can make the route easier to follow, but bends, plants, stairs, and elevation changes may call for a different arrangement.
Avoid choosing fixtures based on brightness alone. Too much light can create glare or make nearby details harder to see, while too little may leave a path or step difficult to make out. Instead, consider the purpose of each lighting zone and select fixtures with suitable brightness and beam angles. This can help you compare fixture costs more accurately and plan a balanced layout. Ask your installer how fixture placement, aiming, and spacing will work together across your property.
Which Products and Lighting Technologies Are Worth the Cost?
The best landscape lighting system is not always the one with the lowest fixture price. Consider how often the lights will run, how much upkeep they may need, and whether they can handle the conditions where you plan to install them. In Oregon, that means paying attention to moisture, covered and exposed locations, and the durability of seals, connections, and finishes.
It also helps to look at the whole system, not just individual products. A thoughtfully placed mix of path lights, accent lights, and step or deck lights can provide useful coverage with fewer fixtures than a row of low-output lights. Controls can make the system easier to manage, while adjustable fixtures can accommodate growing plants and changing outdoor spaces.
Before choosing products, set priorities for each area: safe passage, added visibility near an entrance, or a softer atmosphere for a patio. Then compare energy use, materials, warranties, replacement parts, and installation needs. Spending more can make sense when it improves reliability or gives you useful flexibility. In less demanding areas, a straightforward fixture may be all you need.
LED fixtures: upfront cost, energy use, and replacement needs
LED fixtures may cost more upfront than some traditional options, but they use less energy and generally need fewer bulb changes. Tru-Scapes reports that LED landscape lights can use up to 75% less energy than halogen alternatives. Your actual savings will depend on the fixture, how many hours it runs, and your electricity rate.
Check whether the LED is integrated into the fixture or uses a replaceable lamp. An integrated LED can keep the fixture compact, but if the light source fails, you may need to replace the full unit. Replaceable lamps can make repairs simpler. Before purchasing, review the expected lifespan, warranty terms, and availability of compatible parts so you know what future maintenance may involve.
Smart controls, timers, dimmers, and motion sensors
Controls can make outdoor lighting easier to manage and help keep lights on only when needed. Timers follow a set schedule, while photocells respond to daylight. Dimmers let you adjust brightness, and motion sensors can add convenience near entrances, driveways, or service areas. Choose controls for the way you use each space instead of paying for features you may not need.
App-based systems may allow remote adjustments, custom schedules, or color changes. These features can be useful, but check whether they require a hub, Wi-Fi connection, or specific compatible products. WAC Lighting describes growing interest in discreet fixtures and customizable lighting controls. Before committing, confirm that the controls work with the fixtures and transformer in your plan, and ask how the system can be operated if an app or network connection is unavailable.
Where solar lights work—and where they fall short
Solar lights can be a practical choice in a small garden bed or another location where running wire would be difficult. They do not need a connection to a low-voltage transformer, and installation is often straightforward. Their performance depends on direct sunlight, battery condition, weather, and the fixture’s light output. Shaded areas and extended cloudy periods can reduce how long or brightly they operate.
For paths, entrances, or areas where dependable illumination matters, solar fixtures may not provide consistent coverage. Low-output lights can leave dark gaps, even when installed close together. Outback Landscape points out that placing too many dim solar lights in a row can create an uneven, runway-like look. Check product claims for brightness and runtime, and test a few fixtures in the intended spot before buying enough to light the entire yard.
Durable outdoor finishes: brass, copper, and other materials
Outdoor fixtures face rain, soil, temperature changes, and, in some areas, salt air. Their materials and finishes can affect how well they hold up. Solid brass and copper are popular choices for their durability and natural patina. For coastal settings, Best Pro Lighting recommends considering fixtures made from solid brass or copper.
Other materials may also perform well when they are designed for outdoor use and supported by a clear warranty. Check for corrosion-resistant finishes, sealed connections, and suitability for the installation location. A light under an eave may face less exposure than one beside an irrigated garden bed. Matching the fixture to its surroundings can help avoid premature wear and replacement, particularly in areas exposed to frequent moisture.
Compare brands by warranty, materials, parts availability, and customer reviews
A fixture’s price does not tell you how easy it will be to maintain. Read the warranty carefully: check what it covers, how long coverage lasts, and whether professional installation is required. Look at the fixture body, lens, seals, and connectors, and find out whether replacement lamps and other parts are available. Customer reviews can be helpful, especially when they describe performance over time or the company’s response to a problem.
For a larger home project or commercial property, consistent products and dependable service can make repairs and future additions simpler. Ask your installer which brands they service and how they handle warranty claims. Grand View Research notes growing investment in outdoor lighting designed to support both function and visual appeal. A brand with available components and clear support may offer better long-term value than a cheaper fixture that is difficult to replace.
Choose adjustable, concealed, and layered lighting for changing landscapes
Landscapes change as trees grow, branches spread, and garden beds are replanted. Adjustable fixtures can be redirected as plants mature, while concealed or shielded fixtures keep the hardware from taking attention away from the landscape. For example, a shielded path light can illuminate a walkway while reducing glare. A patio may benefit from a mix of low-level path lights, step lights, and focused accents rather than one overly bright fixture.
Think about future access when planning fixture locations and mounting options. Best Pro Lighting suggests using adjustable fixtures that can be redirected as plants grow. Ask your installer whether the layout can accommodate repositioning or additional lights later. A flexible design can keep the system useful as your planting and outdoor needs change.
What Does Professional Landscape Lighting Installation Include?
Professional landscape lighting installation starts with a plan, not a pile of fixtures. An installer considers how you use the property, where light will be most useful, and how the system can work with existing landscaping and outdoor features. The project may include design, fixture and equipment selection, wiring, controls, installation, testing, and final adjustments.
The details depend on your property, lighting goals, and local requirements. A home may need lighting for paths and patios, while a commercial site may also need well-lit entrances, signs, and gathering areas. Here’s what a professional installation typically includes.
Design plans, lighting goals, and fixture placement
The installer will assess the property and ask what you want the lighting to accomplish. You might prioritize a clearly lit entry, safer walkways, a comfortable patio, or accents on trees and architectural details. Those goals guide fixture type, placement, and the overall layout.
A lighting plan helps show where fixtures will go and how their beams will work together. It can reduce dark spots, limit glare, and prevent an overlit or mismatched appearance. The installer should also consider views from inside the home and how growing plants may change shadows over time. Planning before purchasing equipment can help avoid buying fixtures you do not need. Tru-Scapes’ guidance on common lighting mistakes explains why fixture placement and a clear plan matter.
Wiring, transformer, controls, installation, and aiming
For a low-voltage system, fixtures connect to a transformer that supplies the appropriate voltage for the lighting. The installer determines the transformer’s capacity based on the planned fixtures and may account for future additions. They also select and route wiring to connect the lights while working around paths, planting beds, and other features.
After the wiring is installed, the fixtures are mounted, connected, and aimed. The system may include timers, dimmers, or other controls to manage when lights operate and how bright they appear. The exact setup depends on your design and property. A typical installation process can include a site assessment, equipment selection, wiring, control setup, and fixture aiming. Ask your installer to explain how the proposed system will meet your lighting goals.
Testing, adjustments, and cleanup
Once the fixtures are installed, the installer should test the system and its controls. This can include checking that each light works, connections are secure, and the transformer operates as intended. An after-dark review is especially useful because it shows whether the lighting feels balanced and reveals glare, uneven coverage, or areas that need attention.
The installer can adjust fixture angles and make other changes to improve the result. Before the job is complete, you should have a chance to review the lights and learn how to use the controls. The crew should also tidy the work area and share basic care recommendations. Installation quality affects how well a system performs over time, not just how it looks on the first night. JD’s Landscaping Services offers further insight into installation details that help a system work reliably.
Required permits, inspections, and electrical work
Permit and inspection requirements depend on your location and the work involved. Some projects using low-voltage fixtures may have few local requirements, while other work may require a permit, inspection, or sign-off from a licensed electrician. Ask your installer to confirm what applies to your property before work begins.
If the project involves new line-voltage wiring, changes to an electrical panel, or other work beyond the lighting system, a qualified electrician may need to handle that portion. Confirm who will arrange permits and inspections, whether those costs are included in the estimate, and how the work will be coordinated. Requirements vary between jurisdictions, so check with your installer or local building department. This overview of landscape lighting costs and permits explains why local requirements should be confirmed before budgeting.
Residential and commercial service needs
Residential projects often focus on entrances, paths, patios, gardens, and outdoor living areas. The lighting plan should reflect how your household uses the space, with convenient controls and fixtures suited to the property. If you expect to add a patio, planting bed, or walkway later, discuss that during planning so the system can accommodate future work.
Commercial properties may need lighting for entrances, walkways, signs, parking areas, and outdoor seating or gathering spaces. These projects can involve more fixtures and broader coverage, along with controls that fit business hours and maintenance routines. A professional can develop a plan around how customers, employees, or visitors use the site. Both homes and businesses use landscape lighting to make outdoor spaces more functional and welcoming, as described in this landscape lighting market overview.
Does DIY or Professional Installation Cost Less?
DIY lighting can cost less upfront, particularly for a small area with solar or battery-powered fixtures. Professional installation typically costs more because the estimate may include design, materials, wiring, and labor. The right option depends on how many areas you want to light, how complex the property is, and whether you’re comfortable planning and installing the system.
Compare the full cost of each option, not just the price of the fixtures. Tools, wiring, transformers, repairs, and future additions can affect your DIY budget. For larger properties, challenging layouts, or commercial spaces, a professional can help create consistent coverage and install a system that suits the site.
How DIY kits can reduce upfront costs
A DIY kit can be a reasonable choice for a short path, a few garden beds, or another small area. Solar and battery-powered lights often don’t require trenching or a transformer, which can reduce the initial cost and simplify installation. You can also try different fixture positions before settling on a layout.
Prices vary widely by product and quality. LawnStarter’s landscape lighting cost estimates put 10 solar lights at about $100 to $1,500 and 10 battery-powered lights at roughly $200 to $350. A professional system with 10 fixtures may cost around $1,000 to $2,000. Solar lights need enough sunlight to perform well, while battery-powered fixtures require battery changes. For larger areas or more precise lighting, compare a kit’s coverage and durability with a wired system.
Include fixtures, tools, transformers, and replacements in your budget
For a wired DIY system, fixture prices are only part of the total. Include wiring, connectors, tools, a transformer, and any replacement parts you may need. Landscape lighting component estimates list path lights at about $30 to $100 each, with small-system transformers around $150 to $300. Larger transformers can cost $500 or more.
Before buying, count your fixtures and confirm that the transformer can handle their combined electrical load. Set aside money for outdoor-rated materials and repairs to lawns, planting beds, or hardscaping if installation requires digging. Comparing this complete estimate with a professional quote gives you a clearer picture of what each option will cost.
Avoid DIY pitfalls: poor placement, wiring mistakes, and uneven lighting
Plan the layout before you dig or run wire. Lights placed too close together can create harsh bright spots, while poorly aimed fixtures may shine into windows or seating areas. Sprinklers can repeatedly soak fixtures installed in the wrong location, and an overloaded transformer may cause lights to flicker or fail.
Mark paths, steps, plants, and gathering areas before choosing fixture positions. Then test the lights after dark and adjust their aim to reduce glare and fill in dark areas. Common landscape lighting installation mistakes include skipping a layout plan and overloading the transformer. If you’re unsure about wiring, system capacity, or where to place fixtures, ask an installer for guidance before starting.
Compare low-voltage systems with line-voltage work and safety needs
Most residential landscape lighting uses a 12-volt low-voltage system. It is generally easier to install than line-voltage lighting, but it still needs a compatible transformer, secure connections, and equipment rated for outdoor use. Follow the manufacturer’s instructions and check local requirements before beginning work.
Some larger or higher-output applications use 120-volt line-voltage systems. This work involves greater electrical risks and should be handled by a licensed electrician. A landscape lighting installation guide estimates that line-voltage projects may add 30% to 50% in labor costs compared with low-voltage installations. If your project requires new electrical connections, or you’re uncertain about safe installation, hire a qualified professional.
Know when to hire an installer for design, installation, and warranties
Consider hiring an installer for a large property, a complex layout, long wire runs, steep terrain, or areas with existing hardscaping. A professional can plan lighting zones, select fixture locations, check transformer capacity, and aim each light to limit glare. For commercial properties, a coordinated plan can provide consistent lighting around entrances, walkways, and outdoor gathering areas.
Ask for a detailed estimate that lists fixtures, materials, labor, controls, electrical work, and any permits or inspections. Confirm whether the warranty covers products, installation, or both, and ask how repairs and future additions are handled. Professional projects usually cost more upfront, and peak-season scheduling may require extra lead time. If you plan to install the system in stages, discuss how the initial design can support added fixtures later.
How Can You Set a Realistic Landscape Lighting Budget?
Start with what you want your lighting to accomplish, then match the design to your budget. Identify where you need better visibility, which outdoor features you want to highlight, and whether you plan to install everything at once. Request itemized estimates so you can compare design, fixtures, wiring, labor, and any site work. A clear plan helps you spend on lighting that serves your property instead of adding fixtures without a purpose.
Prioritize entrances, paths, patios, and key features
Begin with areas you use regularly and places where visibility matters. Lighting near an entry can help you find the door after dark, while path and step lights make routes easier to see. If you host outdoors, include a patio or deck in your first phase. Then consider accent lighting for trees, stonework, or other landscape features.
You don’t have to light every corner of the yard. Leaving some areas softly lit or dark can help important features stand out and keep fixture costs in check. TLC Incorporated recommends focusing on entryways, paths, and trees while using open space to maintain balance. Ask your installer to plan around the landscape’s key features before selecting fixtures.
Balance coverage, fixture quality, and energy use
A low-priced fixture may cost more over time if it needs frequent replacement or fails to provide the coverage you need. Compare materials, outdoor ratings, warranties, and the availability of replacement parts. LED fixtures can cost more upfront than some alternatives, but their energy use and service life may make them a practical choice for lights you use often.
More fixtures don’t always mean a better result. Too much light can create glare and harsh shadows, while adding to installation and operating costs. Ask your installer to consider brightness, beam direction, and spacing as part of the design. A balanced lighting plan can highlight paths and landscape features without overwhelming the space. Compare options by both initial price and expected upkeep.
Plan phased installation and future additions
If the full project doesn’t fit your budget, divide it into practical phases. You could start with the entrance, main walkway, and patio, then add garden accents or lighting for other areas later. Tell your installer what you may want to add. They can plan the wiring layout and transformer capacity with future fixtures in mind, helping you avoid unnecessary changes.
Choose components with the long-term plan in view. For instance, installing LED fixtures from the start may prevent the expense of replacing an older lighting system later. CAST Lighting’s budgeting advice recommends accounting for LED technology when planning a project. Even if you install in stages, ask for a design that considers the intended final layout, so each phase works well on its own and fits the larger plan.
Budget for maintenance, repairs, and transformer capacity
Set aside funds for cleaning, adjustments, and occasional repairs. Outdoor fixtures are exposed to rain, debris, shifting soil, and plant growth. Over time, lights may need re-aiming, connections may need inspection, or damaged components may need replacement. Ask your installer what routine maintenance involves, which parts are covered by a warranty, and what a service visit typically includes.
Include transformer capacity in your initial estimate, especially if you expect to add lights. A transformer needs to be properly matched to the system’s load and planned expansion. Tru-Scapes notes that transformer sizing is an important consideration for system performance. Ask for the transformer’s specifications and how much capacity will remain after the initial installation. This gives you a clearer picture of the cost of future additions.
Avoid excess fixtures, underestimated labor, and budgeting mistakes
Ask for a lighting plan before purchasing fixtures. A sketch or design proposal shows where each light will go and what it is intended to illuminate. Reviewing the layout first can help you catch dark spots, overlapping beams, or fixtures that don’t suit the space. Tru-Scapes advises against buying fixtures before creating a design, since a plan helps guide both product choices and placement.
When comparing estimates, check whether labor, wiring, trenching, transformer setup, controls, and cleanup are included. Rocky soil, long wire runs, existing hardscaping, and limited access can add time and expense. Ask each contractor to list what the estimate covers, note any assumptions, and explain which conditions could change the price. A written breakdown makes bids easier to compare and helps you set aside funds for unexpected work.
How Can You Maintain Landscape Lighting and Reduce Repair Costs?
Routine checks can help your landscape lighting stay reliable and catch small issues before they turn into costly repairs. Walk your property a few times a year, especially after storms, yard work, or seasonal changes. Keep an eye on how each fixture performs and note any changes in brightness, aim, or coverage.
Clean fixtures and check connections regularly
Dirt, pollen, grass clippings, and water spots can cloud fixture lenses and reduce the light reaching paths, plants, and outdoor living areas. Wipe fixtures with a soft cloth and mild soap, then make sure lenses and covers are secure. Avoid abrasive tools or harsh cleaners that may scratch the finish.
As you clean, look for loose connections, exposed wire, or fixtures that have shifted. Connections need to stay secure and sealed to help keep moisture out. JD’s Landscaping Services explains how loose or poorly sealed connections can lead to failures. If you find damaged wiring or need to open a connection, ask a qualified lighting professional to inspect it.
Inspect wiring and replace failed bulbs or components
Walk the property after dark and check that each fixture turns on and provides the coverage you expect. A light that no longer works may need a new bulb or component, but the cause could also be damaged wiring, a loose connection, or a transformer issue. Make a note of which fixtures are out and whether nearby lights have also changed.
Check for wires that have surfaced or become exposed during gardening, edging, or other yard work. Keep digging and cutting away from known wire routes, and tell landscapers where the wires run. Replace failed parts with compatible, outdoor-rated components. If several lights stop working or a replacement does not fix the problem, have an installer check the system.
Re-aim fixtures as plants grow and seasons change
Trees and shrubs can gradually block a beam that once highlighted a walkway, garden bed, or architectural feature. Check fixture aim as part of seasonal yard care. Trim plants where appropriate, or adjust the fixture so the light reaches its target without shining into windows or creating glare for neighbors.
Review the lighting from different viewpoints, including inside your home and along the paths guests use. Adjustable fixtures make it easier to respond as plants grow or outdoor spaces change. Best Pro Lighting recommends considering viewing angles and using fixtures that can be redirected as landscaping changes. If a fixture keeps shifting or is difficult to reach, ask an installer to check its placement and mounting.
Check for moisture, debris, and weather damage
After heavy rain, wind, or an icy spell, look for standing water, mud, leaves, and visible damage around your fixtures. Clear debris and check that mulch or soil has not covered the fixture. Take note if sprinklers soak a light regularly, since repeated exposure to water can contribute to wear.
Look for cracked lenses, corrosion, loose stakes, or fixtures that have tilted. If you see water inside a fixture, turn off the system before touching it and arrange an inspection. JD’s Landscaping Services points to sprinkler placement and weather exposure as potential sources of fixture damage. In Oregon, regular checks after wet or windy weather can help you spot problems early and address them before they affect more of the system.
Call a professional when troubleshooting or repairs require one
Some upkeep is simple, but recurring outages, damaged wiring, tripped breakers, or transformer problems need a closer inspection. Avoid digging near suspected wires or opening electrical components unless you’re qualified to work on that system. For line-voltage lighting or other electrical work, contact a qualified professional.
An installer can test connections, check transformer capacity, replace damaged components, and adjust the layout as your landscape changes. They can also assess glare and uneven coverage to help keep the system comfortable and useful. Dustmen Electric discusses how professional planning can support visibility and comfort. Before you schedule service, note which fixtures are affected, when the issue began, and whether recent yard or electrical work may be related.
What Should You Ask Before Hiring a Landscape Lighting Installer?
Before you compare landscape lighting bids, make sure each installer is pricing the same scope of work. A lower estimate may leave out important items, such as controls, permits, fixture aiming, or cleanup. Ask for a written breakdown and have the installer explain any costs that could change once work begins. This makes it easier to compare proposals and decide what fits your property and budget.
Share how you plan to use the space, too. You may want safer paths to the front door, a more welcoming patio, or lighting that helps customers find a business entrance after dark. Tell the installer which features matter most and whether you expect to add lighting later. Those details can shape fixture placement, transformer capacity, and the overall design. For context, a landscape lighting cost overview explains how project costs can vary with fixture quality and installation complexity.
Which fixtures, materials, labor, and permits does the estimate include?
Request an itemized estimate that lists fixtures, wiring, transformers, controls, design, labor, and any permit or inspection fees. Confirm the fixture types and materials, and check whether installation, aiming, testing, and cleanup are included. Ask how the installer will handle unexpected work, such as replacing damaged wiring or repairing hardscaping. Agree that extra charges need your approval before the work proceeds.
Permit requirements can vary depending on the project and local rules. Ask who will check whether permits or inspections are needed, especially if the work involves new electrical connections. A written scope also gives you a useful way to compare bids: check that each proposal includes the same work and equipment, rather than choosing based on the total alone.
How will the design control glare and meet your lighting goals?
Tell the installer what you want the lights to do, whether that’s make paths easier to see, highlight trees or architectural details, or create a more inviting patio. Ask for a clear explanation of fixture locations and what each light is intended to illuminate. A layered design can provide useful visibility while drawing attention to a few key features.
Ask how the installer will reduce glare from windows, seating areas, nearby roads, and neighboring properties. The landscape lighting design guidance recommends highlighting features without overwhelming the space. You can also ask whether the installer will check and adjust fixture angles after dark. That gives you a chance to see how the lighting feels in use and flag bright spots or deep shadows before the project is complete.
What warranties, maintenance, and repair services does the installer offer?
Ask what each warranty covers, how long it lasts, and whether it applies to fixtures, transformers, wiring, and labor. Find out who to contact if a light stops working or a fixture shifts, and ask how quickly service calls are usually handled. If the installer uses specific brands, check whether replacement parts are available and whether the company can service the system later.
Discuss routine maintenance, too. In Oregon’s damp weather, outdoor-rated equipment and reliable connections matter. Ask whether maintenance includes cleaning fixtures, checking wiring, testing controls, and adjusting lights as plants grow. Get warranty and service terms in writing so you know what to expect. These professional installation considerations can help you prepare questions about workmanship, fixtures, and warranties.
Can the system support commercial needs or future phases?
For a commercial property, describe how people use the space after dark. Entrances, walkways, parking areas, signs, patios, and gathering spaces may need different lighting and controls. Ask how the design will support daily operations and how the system can be serviced without disrupting customers or staff. Confirm that the installer understands the electrical requirements for your project.
At home, consider whether you may add lights to a garden, deck, or path later. Ask whether the transformer has spare capacity and whether the wiring layout can support additions without major rework. Planning ahead can make a later phase simpler. This transformer capacity guidance explains why it helps to account for possible expansion when choosing equipment. Ask the installer to outline what the current system can support and what future additions would involve.
Frequently Asked Questions
How much should I budget for landscape lighting installation?
A professional low-voltage LED project often costs $2,000 to $6,000, with a standard-yard project averaging around $3,250. Your quote will depend on the layout, equipment, wiring, access, and labor. Treat these figures as planning estimates, not a guaranteed price.
Does a landscape lighting quote include fixtures and installation?
It may include design, fixtures, wiring, a transformer, controls, labor, testing, and cleanup, but proposals vary. Ask for an itemized estimate and confirm whether permits, electrical work, fixture aiming, and repairs are included.
Is DIY landscape lighting a good choice?
DIY can work for a small, simple area, especially with solar or battery-powered lights. For wired systems, large properties, tricky terrain, or commercial sites, a professional can help with placement, transformer capacity, wiring, and local requirements.
What should I look for in landscape lights for an Oregon property?
Choose fixtures rated for outdoor use and suited to their exposure. Lights near wet soil or open garden beds may need more moisture protection than fixtures under a covered patio. Ask about durable materials, sealed connections, warranties, and replacement parts.
Can I install landscape lighting in phases?
Yes. Start with priority areas such as an entrance, main path, or patio, then add other zones later. Tell your installer about future plans so the initial design can account for transformer capacity and possible additions.